DIY Kitchen Art: Coffee Cup Collages
This post may contain affiliate links for your convenience. Read my full disclosure policy here.
Believe it or not the inspiration for this project started with chairs. When I saw these amazing chair prints I was inspired to create my own version by elevating an everyday object into art. ‘Cept I’m not that talented, so mine look nothing like them.

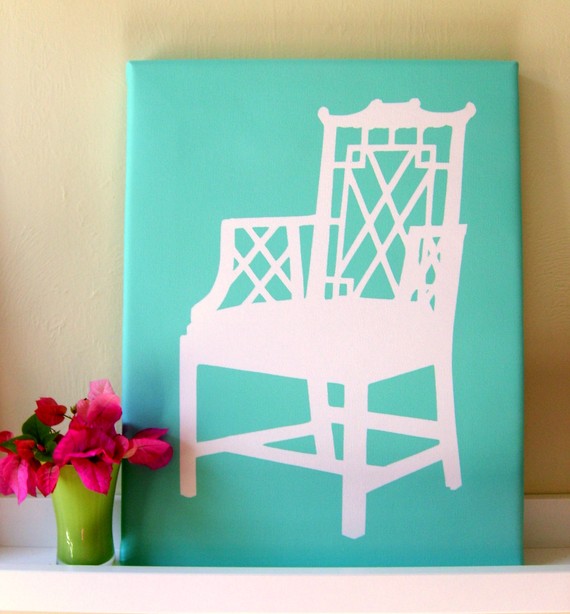
Remember I said inspiration… not knock-off. There’s no way I could make chairs prints better than The Biltmore or Annechovie, and since I wanted decor for my kitchen I decided on coffee or tea cups. Plus, I am hoping that second chair print will eventually live in my house. I’m so in love with it. 😉
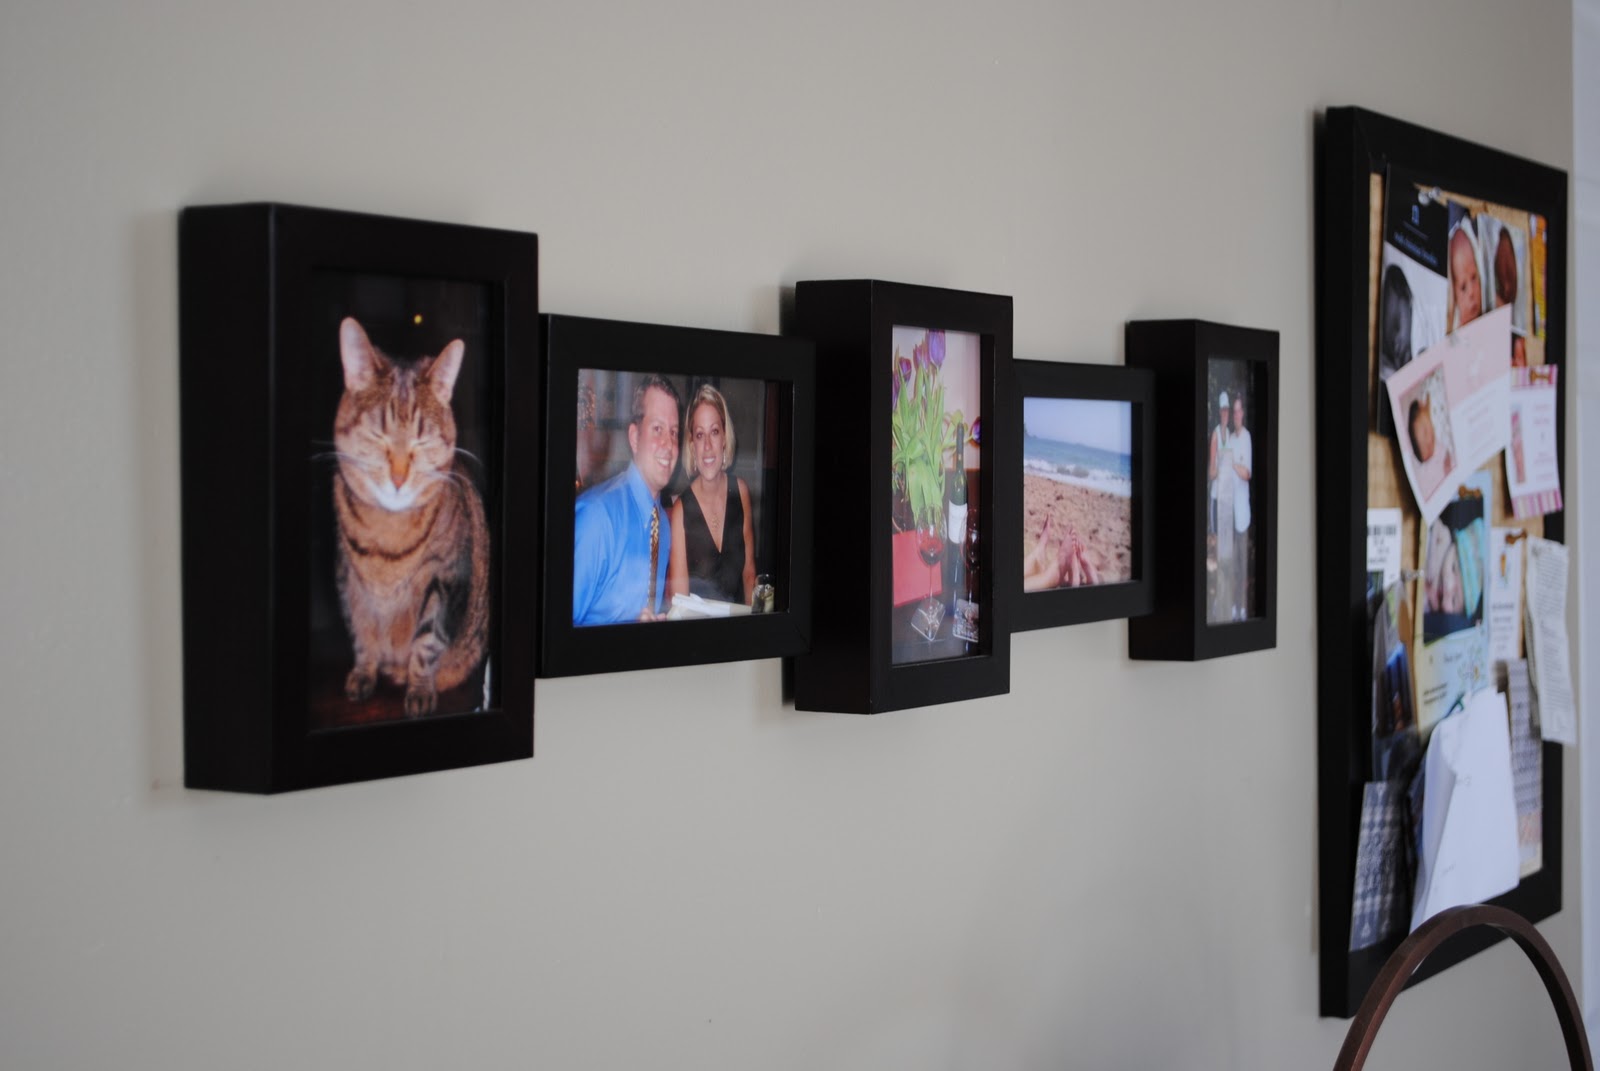
Originally I thought I’d use my favorite medium, decoupaged canvas, but on a whim decided to makeover a set of frames I already had hanging in the kitchen. I mean, looking at photos of my cat and our feet was sexy during dinner, but it was time for a change.
Since I already had the frame and the spoons, the cost of the entire project was just .97– the price of the vintage book I used for the collage.
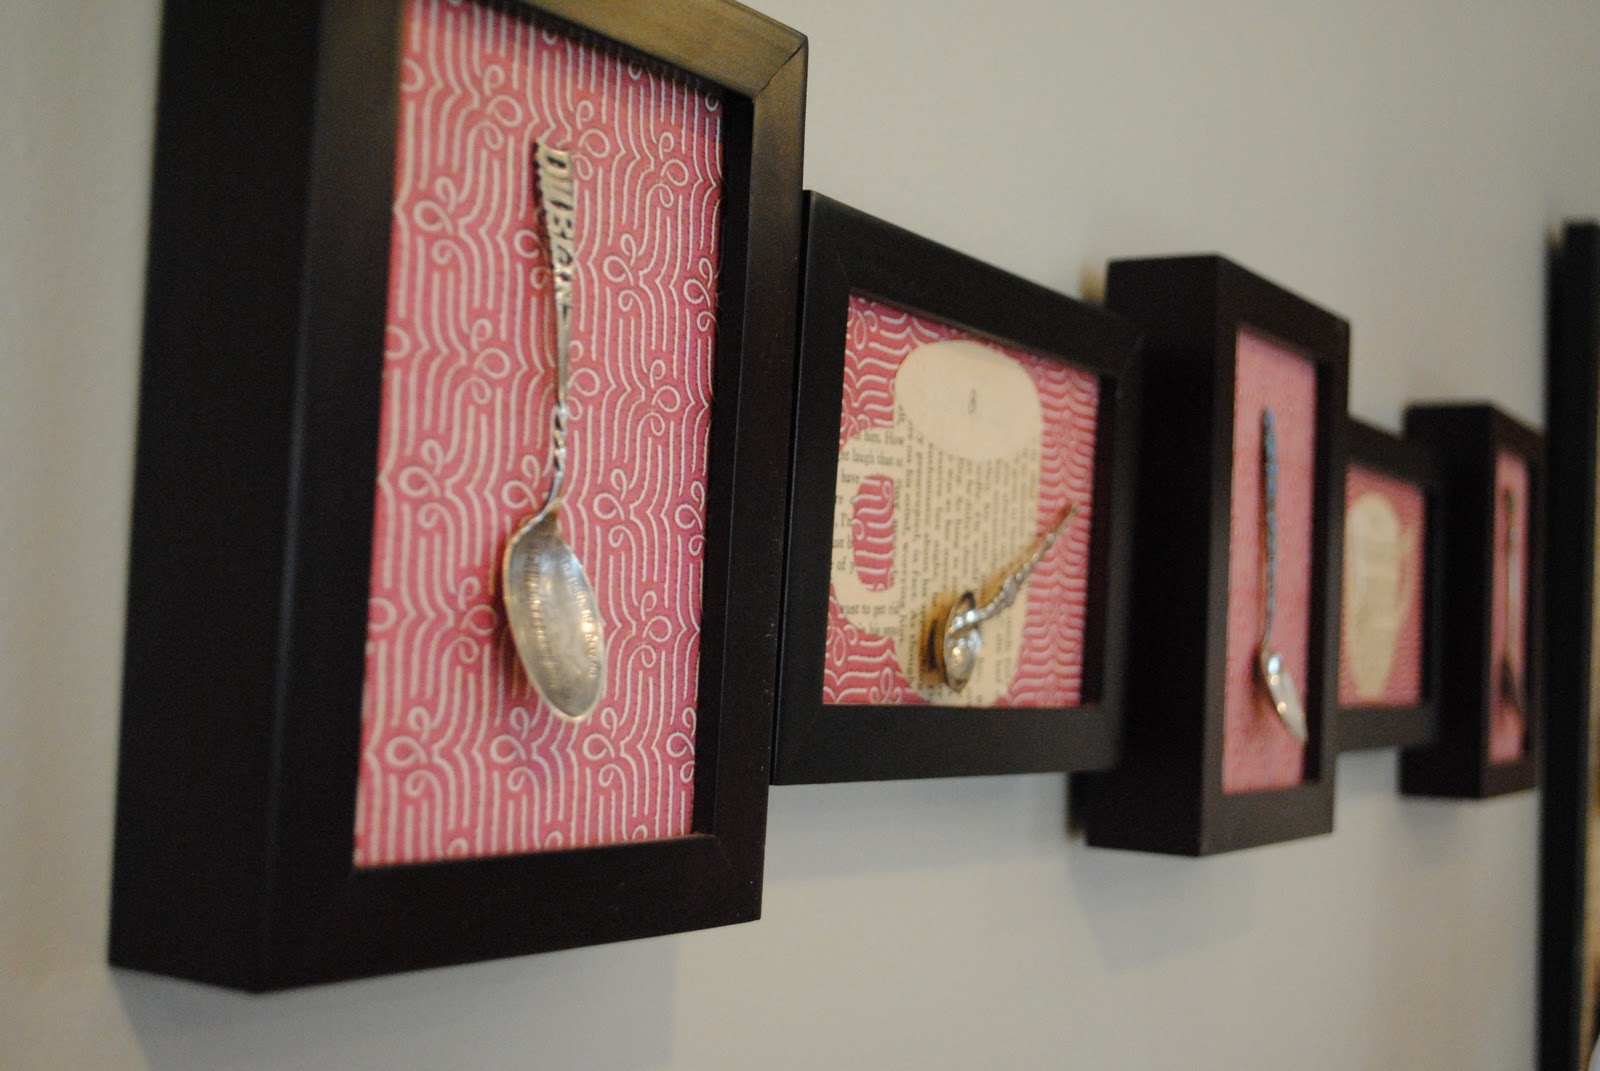

With the exception of the one in the middle, the spoons came from my Grammie. The one in the middle was from an antique store in Hershey when we lived there last year {oddly, it says Juneau. But I loved it and had to have it}. Ahhhh, memories.

Here’s how I did it, step by step:
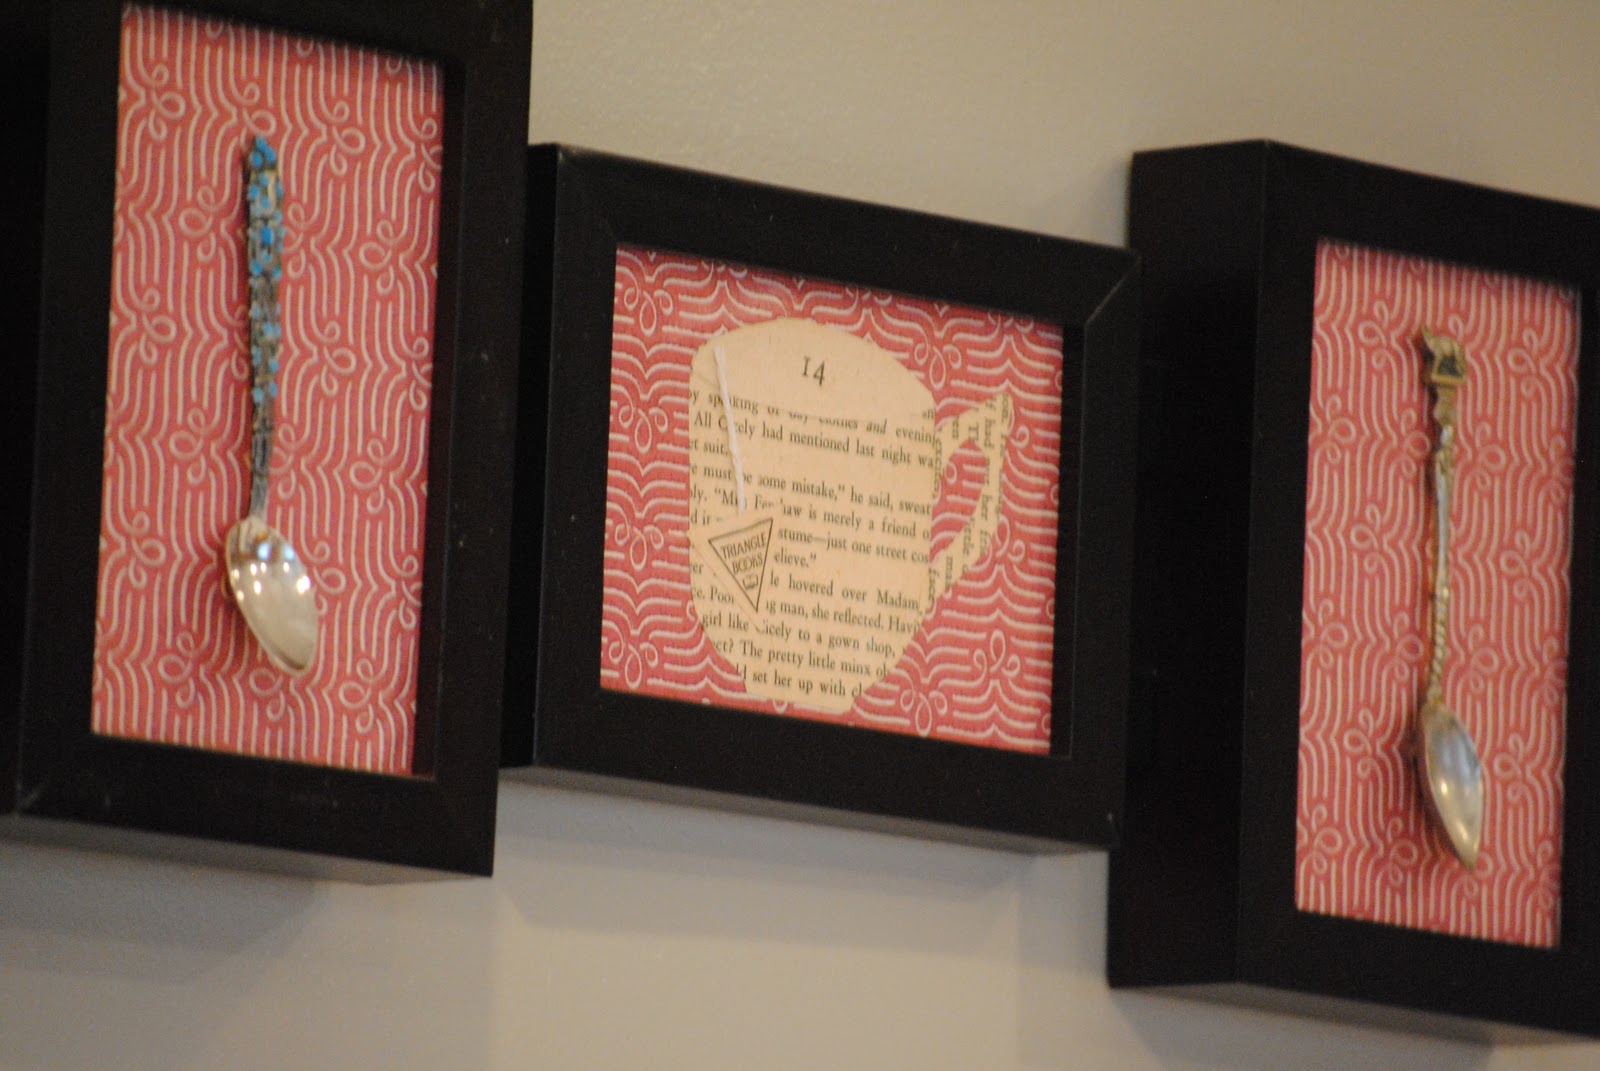
1. First I looked for the perfect pages to use from the vintage book. It took awhile to find a one without words like “murder” or “dirty” or other ungainly things. I love the page I chose because it refers to someone as a ‘pretty little minx!’ Gems like that make it interesting.

2. Then I sketched the cups onto the vintage pages. I cut them out and assembled the pieces.
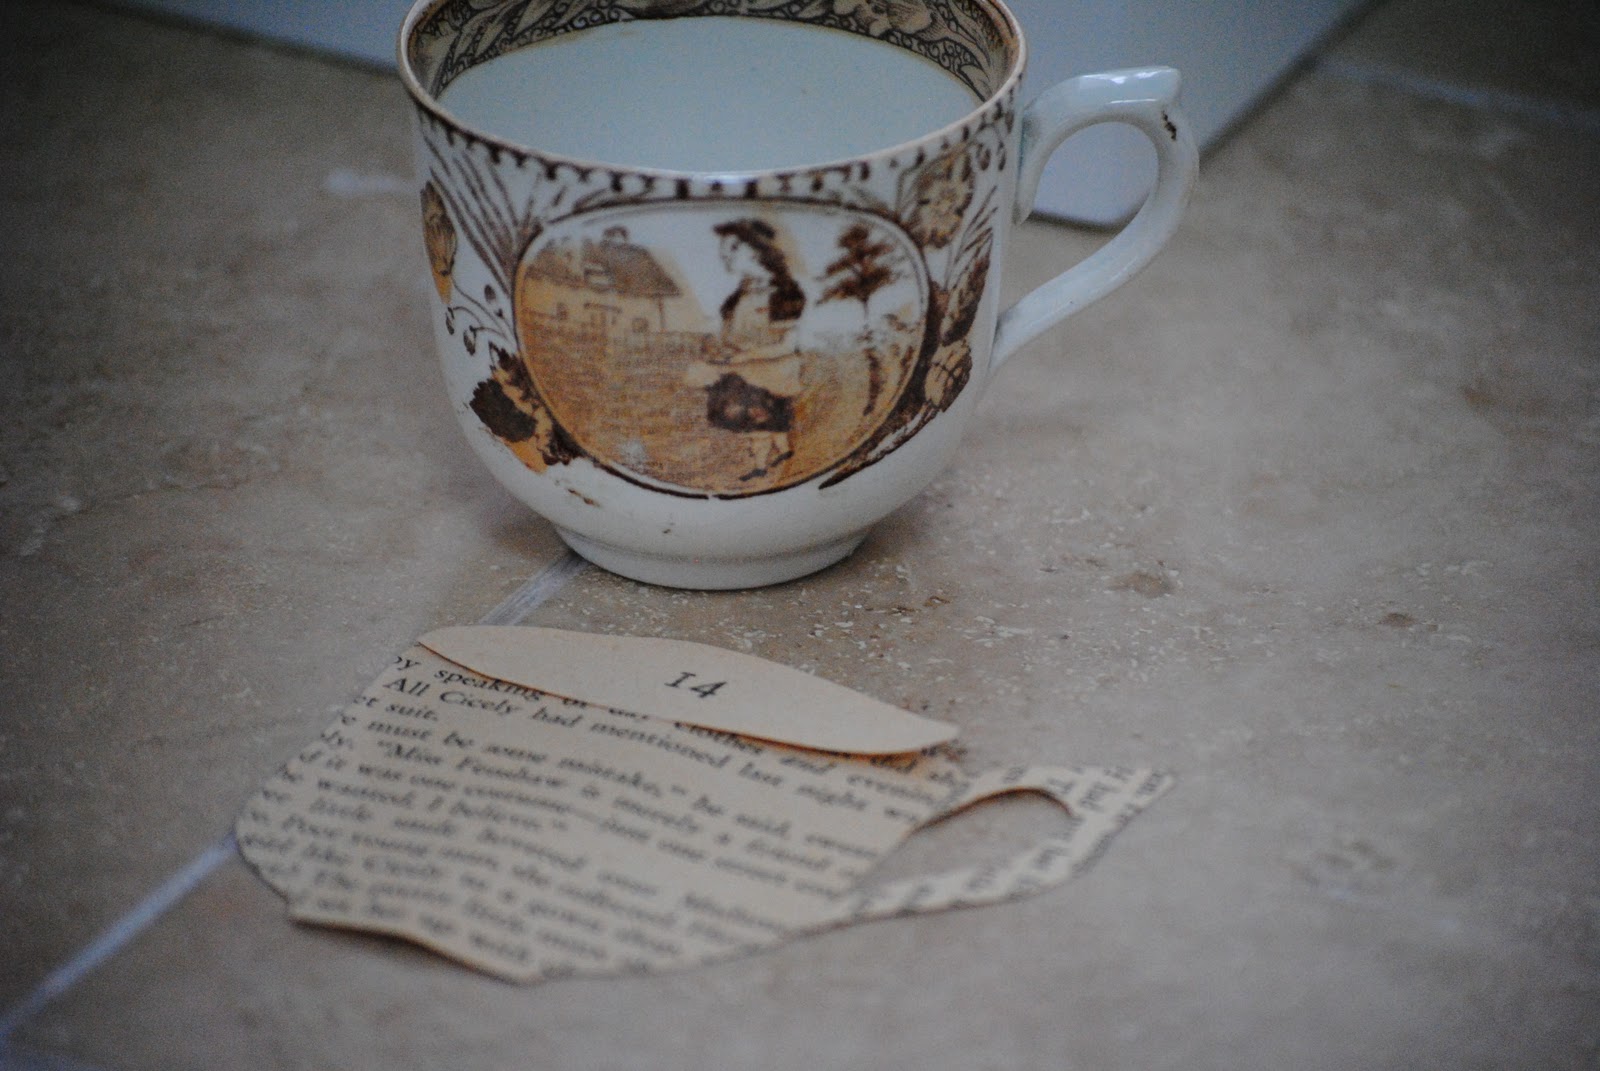
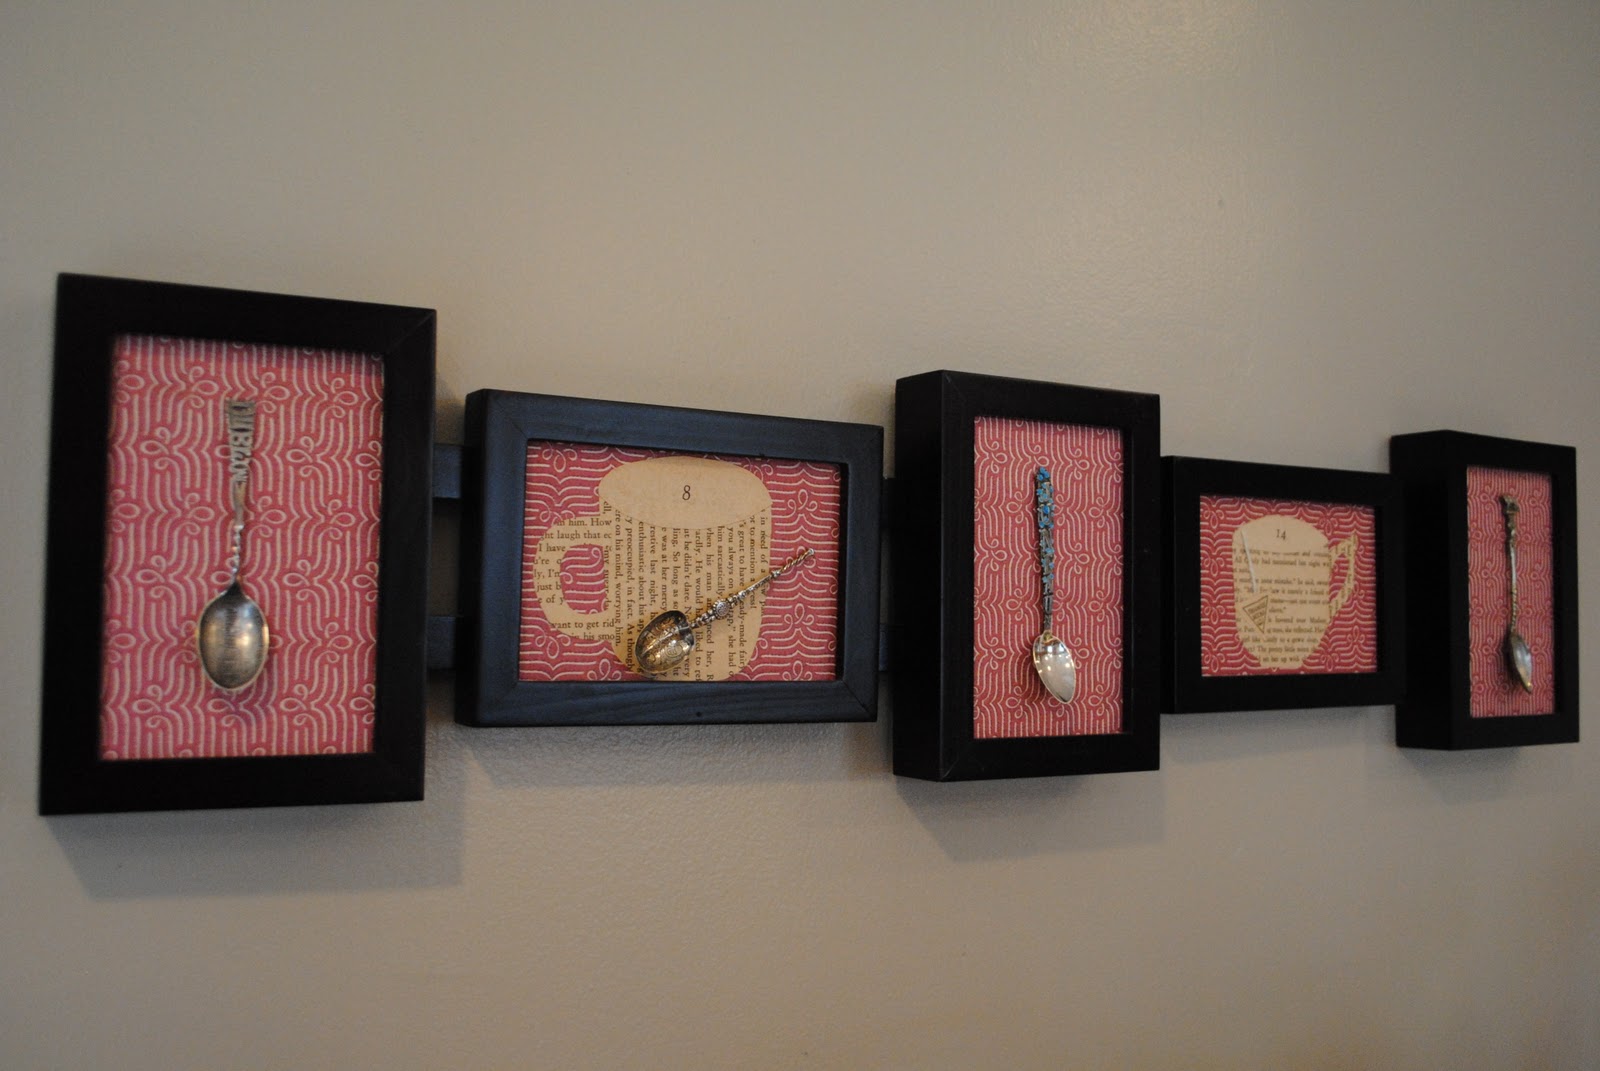
3. Next came the Mod Podge. I mod-podged the cups onto scrapbook paper cut to the size of the glass in the frame. The numbers on the cups are actually Chapter Numbers, and they just-so-happen to be our wedding anniversary. 😉


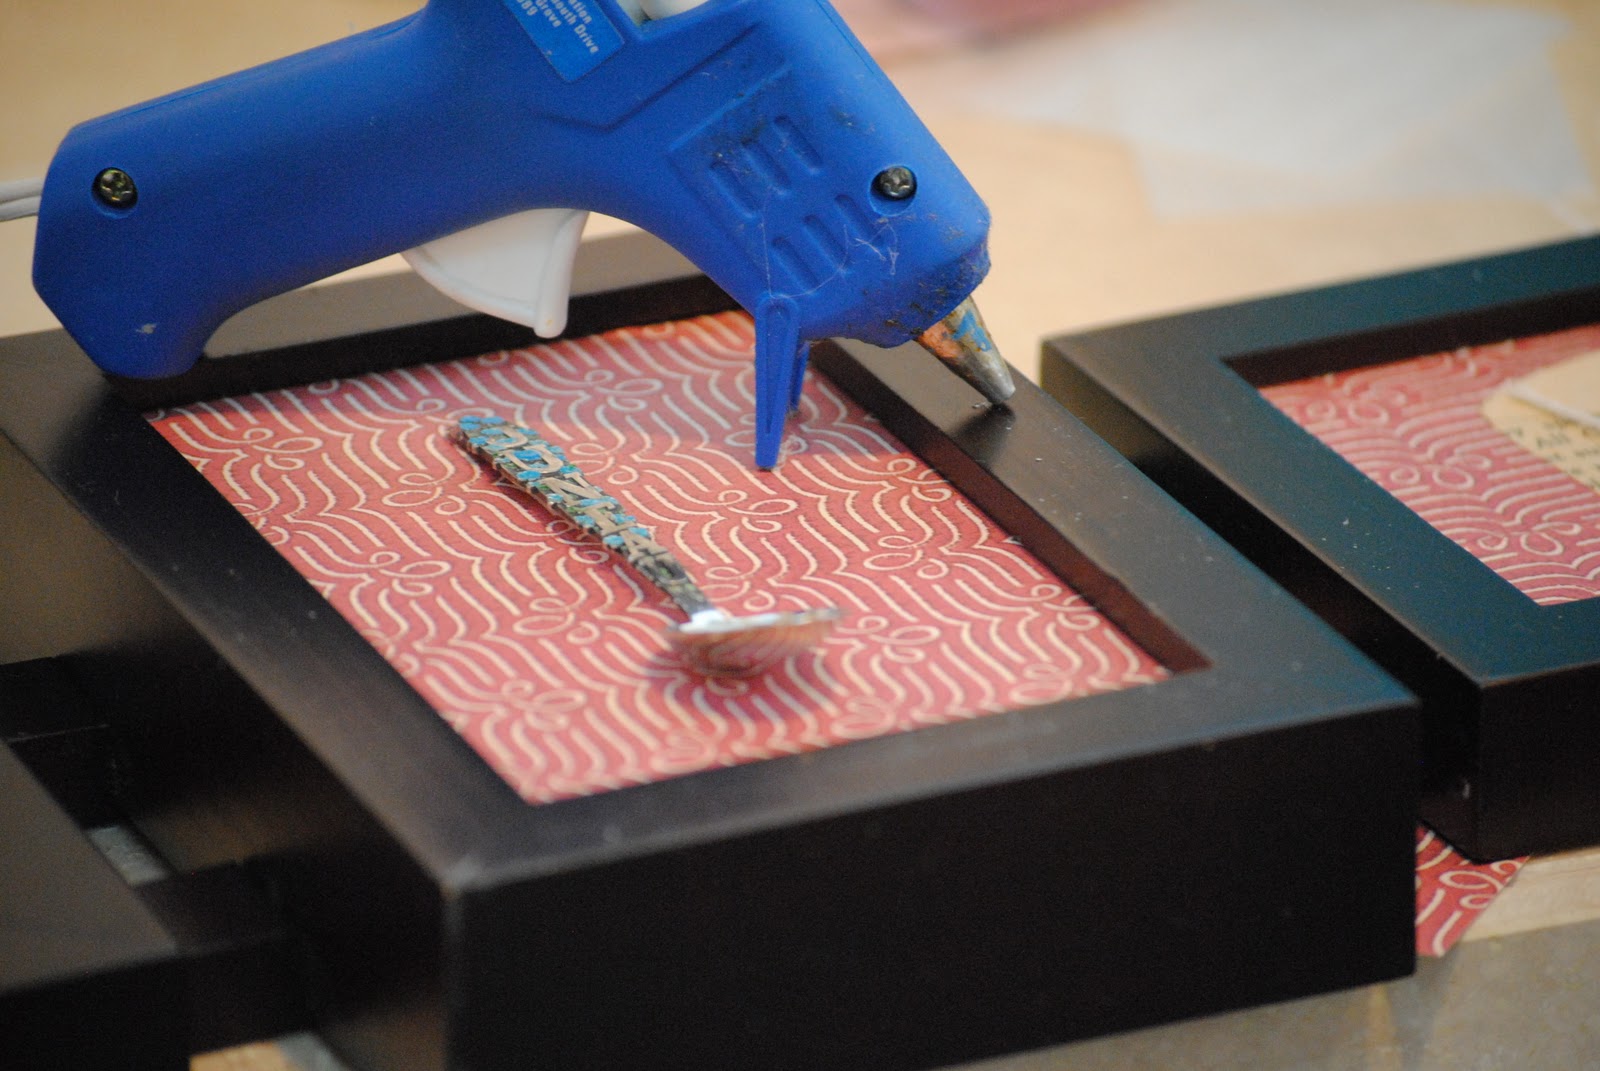
4. Here’s where I realized I needed to use the glass behind the collages if I wanted to use the spoons. Taking a risk, I mod-podged them right onto the glass. Is mod-podge a verb? YES.


5. Now that everything was sturdy, I assembled the frames with my little cup prints and plain scrapbook paper. Once I flipped it back around, they were ready for the final touch– the spoons.

6. Um. Looks like I need to polish them. Excuse me while I do that.
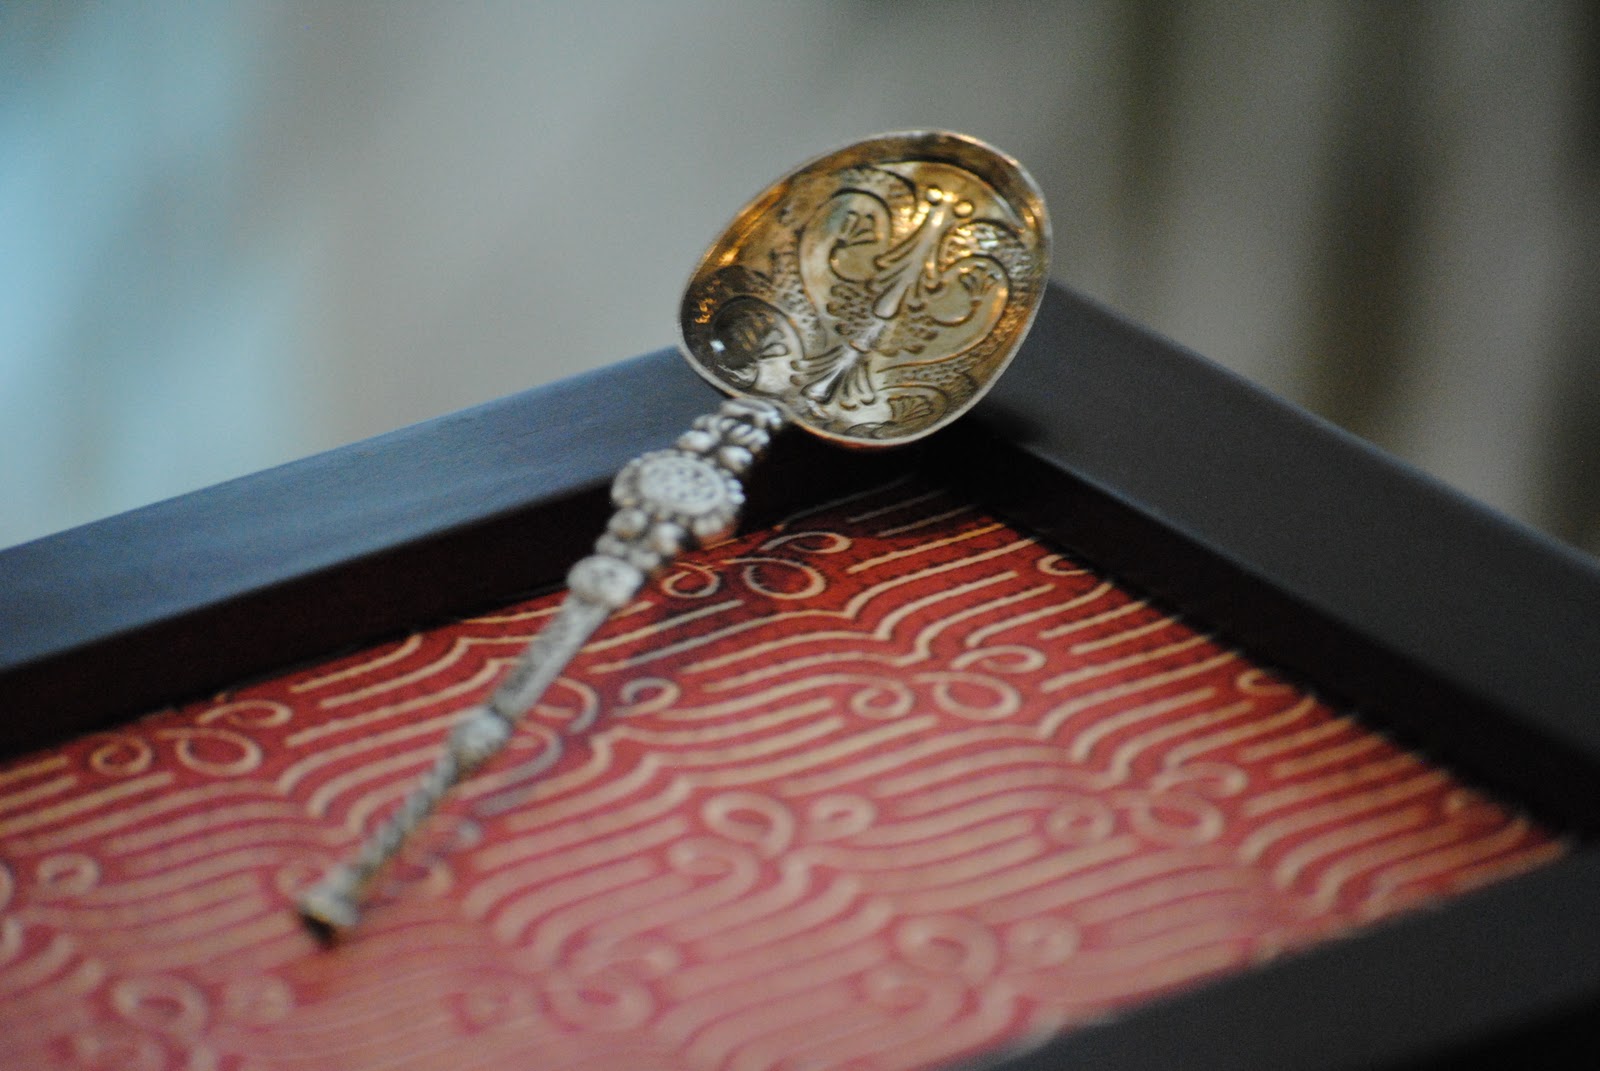
7. Okay! Spoons are shiny, ready to go! I used hot glue to attach them (according to the crafty goddesses on the Interwebs this is safe. I felt that it was better to display Grammie’s spoons and risk a little damage than have them sit in a drawer unloved).
8. On the wall. Anniversary represented. Grammie represented. Love of coffee represented. Pretty little minx… represented? :: happy dance ::


Cheap, easy, fun to create, a mix of vintage and modern, and full of memories. Yup, this was the perfect project for me! You can recreate it on the cheap using spoons, books, and frames from either a thrift store or the Dollar Store.

Wouldn’t the cup collages look amazing done larger on crisp white canvas? Or like the second chair print, it could be done on a bold color? It would certainly make it more modern. I have a feeling I’ll find out soon, once I get an idea in my head it’s hard to keep it out…
{linked this to the $5 Challenge on CSI Project!}