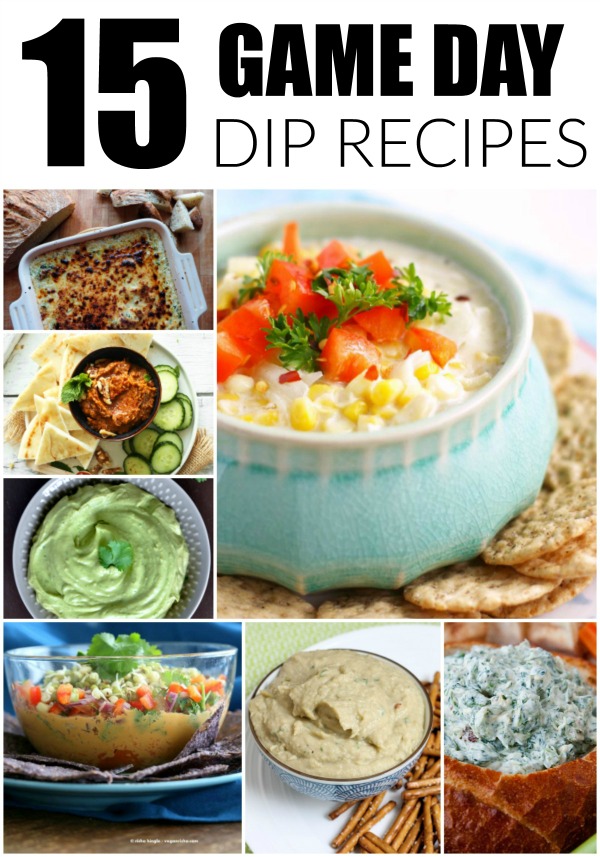
I’ve cooked a full Thanksgiving meal for guests a few times now, and each time I found I needed to keep a running list (with a timetable!) posted on the fridge. It takes careful planning of time, space, and manpower to pull it off– especially with the oven going full force! Ah, I still remember the year my mom’s oven broke ON CHRISTMAS and we had to do all our cooking at our neighbor’s house. Thankfully they are Jewish and hadn’t planned on making a big dinner so their oven was free. Thank goodness for great neighbors! That’ll teach you to try to auto-clean your oven on a holiday, mama!
Part One of the intricate game plan is getting the recipes together. Here’s my list of the menu, with links to recipes if I have them. The code after each one designates where the final step takes place, which allows me to make sure I don’t have 6 stovetop dishes for 4 burners!
Main Meal:
- Roasted Butternut Squash Soup (make night before and reheat) *ST
- Dinner Rolls (either buy or make dough in bread machine; pop in oven while turkey rests) *OV
- Cranberry Sauce I going to attempt this recipe but have a can on hand just in case (make night before) *FRIDGE
- Roasted Turkey (recipe is below) *OV
- Gravy (recipe from Joy of Cooking) *ST
- Martha’s Mashed Potatoes (this recipe is really good– horribly fattening, but its Turkey Day! Let it go!) *ST
- Light {but yummy} Sweet Potato Casserole (my dad, the diabetic, requested Sweet Potatoes with Marshmallow Topping. I think he’ll like this lighter version instead!) *OV
- Stuffing (I admit it– this one is from a box. I plan on using low-sodium broth for extra flavor, plus hopefully the gravy will make it taste more homemade!) (*ST)
Desserts:
pumpkin pie
apple pie
pumpkin cake roll
farm fresh vanilla ice cream
Beverages:
white wine and sparkling grape juice with dinner
coffee and port with dessert
Now that the menu is set, Part Two is printing out the recipes and making my grocery list. Part Three is coming up with the timetable so that everything gets in the oven and is ready on time!!! Those parts to follow soon. Now here it is, the foolproof turkey!
It sounds like it won’t work, but TRUST ME, it does! I made it last year and it was delish! Plus, it cooks in 2 1/2 hours. How awesome is that?!?
I didn’t include directions on preparing the turkey for roasting. For that, I turn to my handy Joy of Cooking cookbook. If this is your first time, I’d make sure to read it a few night before because it’s long. Also, be sure to have turkey lacers on hand to sew up the bird! I followed the Joy of Cooking directions and it worked well. Here is some good, basic information on selecting and safely cooking your turkey form an article called Turkey Talk. I highly suggest you make sure to defrost the turkey well in advance… Last year, ours didn’t defrost in time and I had to get up at 4 AM and defrost it in water in a Rubbermaid bin in our bathtub! It was crazy!
1. Preheat oven to 450 degrees.
2. Put 15-20 lb. UNSTUFFED, COMPLETELY THAWED turkey into deep roasting pan. (NOTE: if turkey is 20-25 lbs., just add 15 minutes to last hour. If turkey is 10-15 lbs., subtract 15 minutes from last hour.
3. Pour 16 oz. water or broth into bottom of pan. Cover turkey with aluminum foil (TENTED, not sealed!)
4. Put turkey into hot oven, set timer for 90 minutes, and WALK AWAY. (Do NOT keep opening the oven. That bird isn’t going anywhere!)
5. When timer rings after 90 mintues, take foil tent off turkey. {Here’s a deviation from the original recipe: it’s a family tradition to put a few slices of bacon over the top of the bird and let them cook on the bird. In my 34 years of Thanksgiving meals, this bacon has NEVER made it to the table. It’s so delicious that everyone gathers around and pulls it off when the bird comes out of the oven before carving! Each year I try to cram more bacon on the bird, but it still never makes it longer than 5 minutes after that bird comes out!}
6. Lower heat to 400 degrees, set timer for one hour, and walk away. This is your chance to work on those other side dishes, set the table, or drink some wine!
7. When timer rings, take turkey out of the oven. {NOTE: I’m adding this part: the turkey should be done at this point. If the button in the turkey hasn’t popped, check with a meat thermometer to test doneness. Really, it’s done, but I had to add that to make sure everyone is uses best practices in food safety!} Remove from pan to rest on cutting board (while the bird gathers juices/thoughts) for 15-20 minutes before carving.
8. Use turkey juices in pan to make gravy.
9. If you are making stuffing, do so in a separate pan. You can use leftover juices to add flavor if you wish.
Recipe from Alice Yuch, "Alice in Infoland"
Emily S says
Mmmmmm sounds like a very yummy Thanksgiving!!
RW @ TrueBeauty says
Oh my goodness that sounds so good!!! My mom always takes on the Thanksgiving meal so I don’t really have any good recipes…I should get some though. Thanks for sharing!
Its So Very Cheri says
I would love for you to post this to my Thanksgiving Traditions linky party. It’s open till Thanksgiving.
Cheri