Gift Idea Tutorial: Photo Backed Clock
This post may contain affiliate links for your convenience. Read my full disclosure policy here.
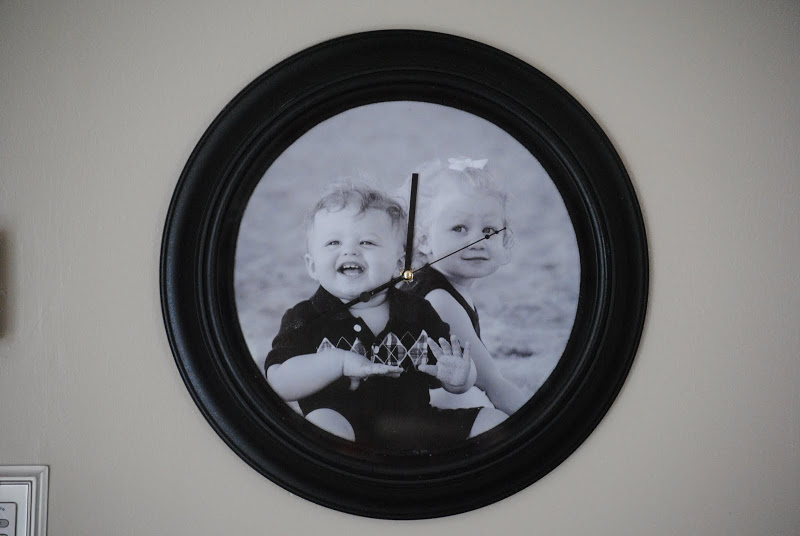
I realize Father’s Day was weeks ago and I’m just posting this tutorial now. I’m going with the adage “better late than never,” because the day when I can pull off writing a tutorial before the actual holiday is probably not in the near future! And really, this could be a gift for anyone on any occasion: Mother’s Day, a birthday, a wedding, an anniversary… consider it the little black dress of gift ideas.
First of all, let me show you what my husband crafted with the kids for my Mother’s Day gift this year:
Paint. With a one-year-old and three-year-old. More paint. On hands. Did I mention paint? HE WINS. Which means I needed to step up my game. A card just would not do it this year.
When I saw a photo-backed clock on the Better Homes and Gardens website, I thought, “hmmmm, that could either be really cute or sorta cheesy.” I put it out of my mind until I spotted a pile of clocks at a local thrift store. My hand moved over them until I found one that had a fabulous frame (‘good bones’, if you will). I finally bought it with the thought that even if I didn’t keep it as a clock it would make a great frame. Because I’m kooky like that. Why I can’t just buy a round frame I’ll never know. Gotta make things hard.
SO. I was enjoying my post-thrifting glow and dozing off to sleep with visions of this bird clock in my head when it hit me like a ton of bricks:
HOLY CRAP. THE CLOCK PROBABLY MAKES FREAKIN’ BIRD SOUNDS.
Sure enough, I flipped it over the next morning and doh-doh-dohhhhhhh. Bird sound box. But the good news is it had a separate battery area for that function. Whew. But first, I needed to make sure it worked at all.
Woot! It works. And no bird calls. So step #1: I unscrewed the ring, collected the screws in a baggie, and cleaned the glass with Windex.
Step #2: I enlarged a favorite photo to 12 by 12 inches (the clock face is 11 inches in diameter so that would give me a little wiggle room) at Ritz photo. You can do this at many different photo places including CVS, but I needed it done quickly in an odd size.
Step #4: Finding the center, I cut a small hole to fit the hands. Then, I realized the second hand extended over the center so the extra piece would make putting the hands through pretty difficult. I tried detaching the clock mechanism to simply place it through that way to no avail. So, don’t try this at home, I bent the second hand’s extended “arm” (if you will) so I could slide it all in at once without creating a huge hole. I used pliers to bend it back but it still looks wonky (see below for helpful hints to avoid this problem):
Step #5: I applied adhesive (a photo-safe glue stick) to the clock face in sections and glued the photo to the clock. Working in a circle I pushed any air bubbles out from under the photo. To fix my Edward Scissorhands approach to cutting out the photo, I glued black cording around the perimeter to hide the places where the circle was uneven.
Step #6: I let it dry for 24 hours without the glass in case the adhesive off-gassed (this happened to me once with rubber cement and a plastic scrapbooking sleeve– it bubbled the plastic!) and placed the glass back on. I screwed on the ring, and…
a clock for my husband with his babies on it, to hang at the office as a reminder of what’s waiting for him at home. Little does he know the drama I could have avoided if I’d followed my own helpful hints below!
- You can use either a new or thrifted clock, the key is to find one with hands that are easy to either remove or thread the photo through.
- If you can’t find a good clock to use, buy a clock kit and use a picture frame instead.
- The smaller the clock face, the easier and cheaper it is to enlarge photos. My photo cost $14 to enlarge because I needed it done in one day and it was 12X12. An 8X10 in one hour is only $3.99 at CVS.
