Thank goodness for friends. My sweet pal Kelly is jumping in to rescue me from a difficult week with a post about a project that kickstarted her love for all things DIY (which eventually led to her power tool obsession). And since to me power tools are scarier than sharks, she’s going to be stopping by once in awhile to share her expertise in the DIY arena. I’ll let Kelly take it from here, please give her a warm welcome!
Hi, my name is Kelly! Carrie and I met at the
Haven Conference this past June. Aside from being fast friends (and who wouldn’t be – I mean, could Carrie
be any sweeter?), we realized we had a lot of complementary interests and could work very well together.
(Oh – and by the way, don’t tell Carrie, but I’m hoping to convince her that power tools are really FUN. Shhhh…. we can’t move too fast on this one…!)
Carrie is being kind enough to let me jump on her blog every now and then to share my DIY adventures (and sometimes misadventures!). Since this week is a busy one for her, it seemed like a good time to start.
Since I’m just meeting all of you for the first time (and it is a pleasure to meet you!), I thought I would start out with one of my very first projects. It was an easy one that gave me the confidence to keep trying other things.
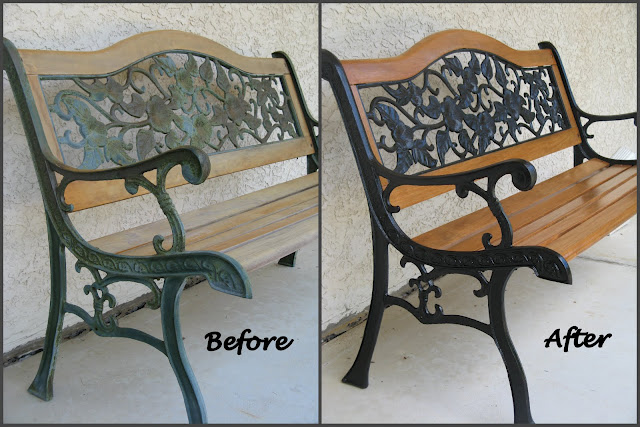
The idea was simple. I had a very old and very worn bench on our front porch which needed some serious TLC.
This bench had been left on our porch and neglected for years. I was actually embarrassed when anyone went to sit on it, for fear of them staining their clothes or ripping their pants. Nice way to greet guests at the front door, right?
Time to get refinishing!

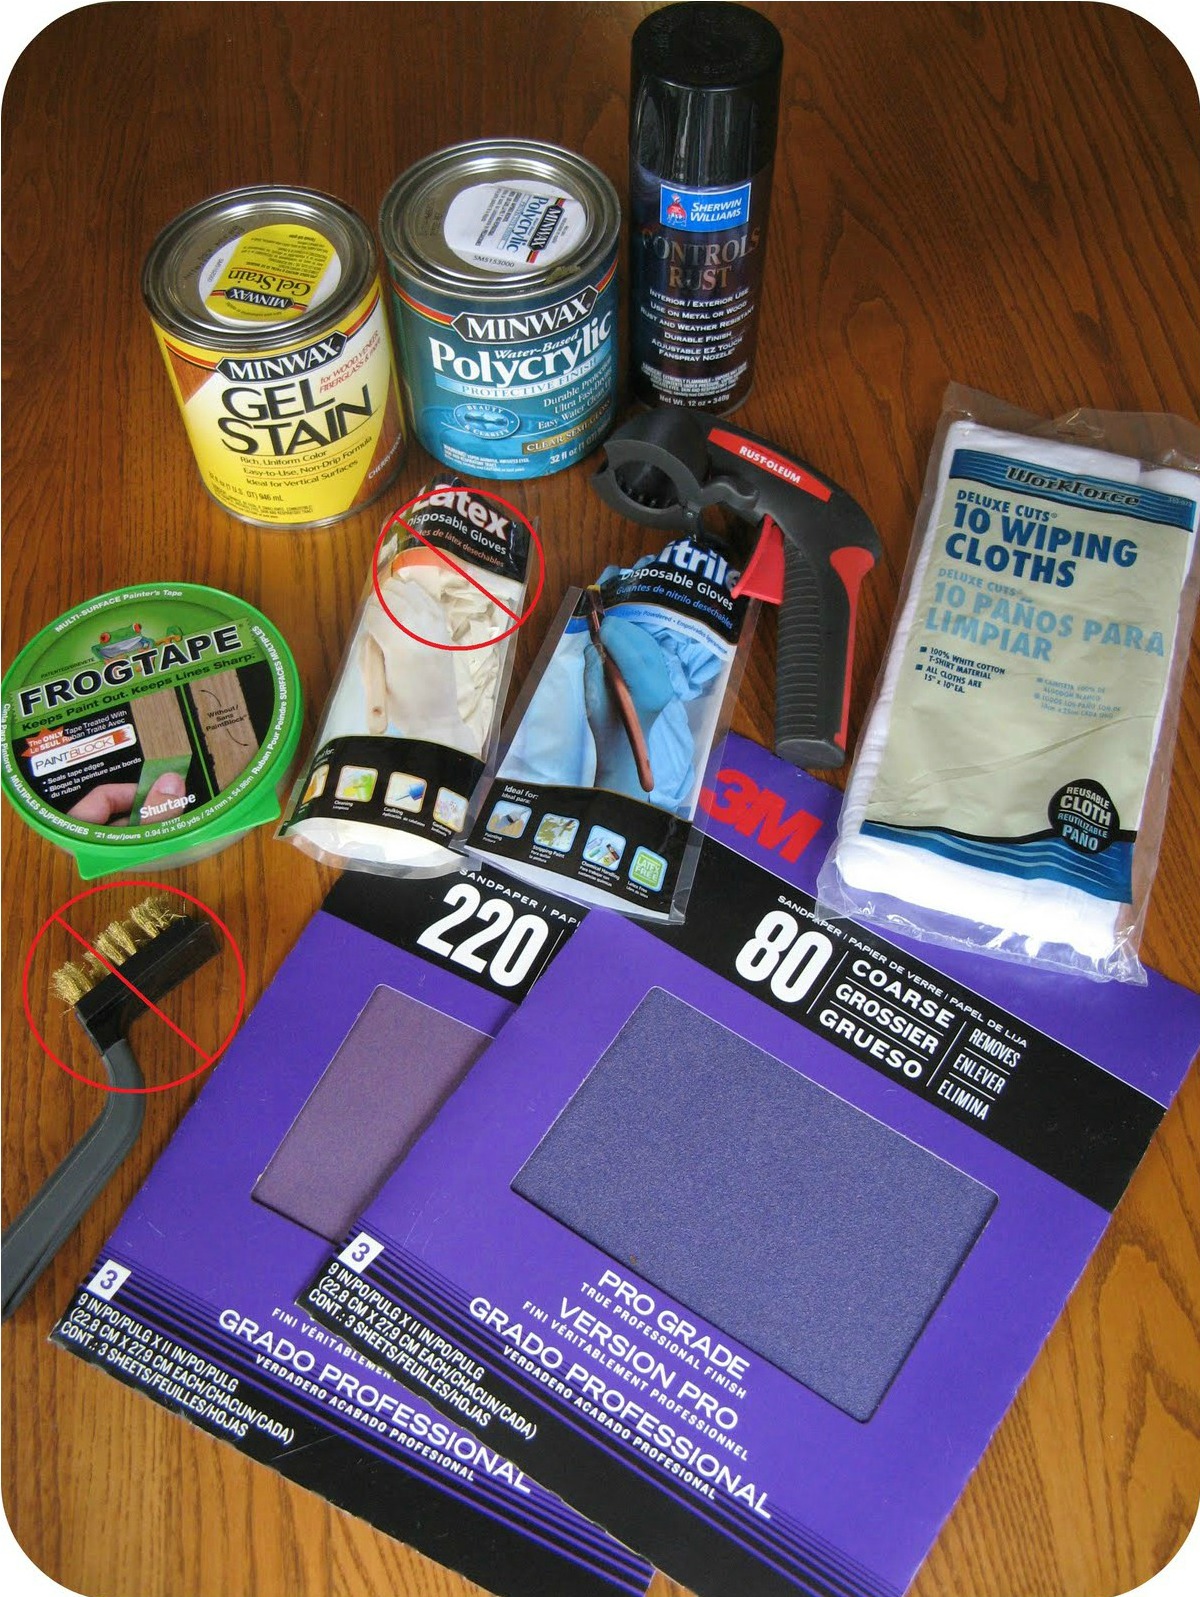
Tools and Materials Used:
- Brass-bristled brush (notice the picture above: do not purchase this particular brush, it fell apart in less than 10 minutes)
- 3M Pro Grade sandpaper in 80 and 220 grit
- FrogTape or other painters’ tape
- Nitrile gloves (not latex – they will disintegrate!)
- Sherwin Williams “Controls Rust” spray paint
- RustOleum spray paint nozzle
- Wiping cloths
- Minwax Gel Stain
- Minwax Water-based Polycrylic Protective Finish
1. Hose off and wash bench with gentle detergent
2. Use brass bristle brush to scrape off as much rust and residue as possible from the metal areas
3. After everything is dry, tape off all wood with FrogTape (or any painter’s tape)
4. Spray paint all metal areas (at least 2 coats – spraying lightly so it doesn’t drip or bubble). I used the RustOleum nozzle, which really makes spraying easier
5. When paint is completely dry, remove painter’s tape
6. Sand wood, first with 80 grit sandpaper. Clean off dust and finish with 220 grit sandpaper
7. Use wiping cloths to apply stain to the wood, in as many coats necessary to get the color you like. I used Minwax gel stain, which is thicker and was easier for me to coat the narrow slats of the bench.
8. Using a synthetic paint brush, apply water-based Polycrylic. This step takes the longest and required patience to allow each coat to dry completely.
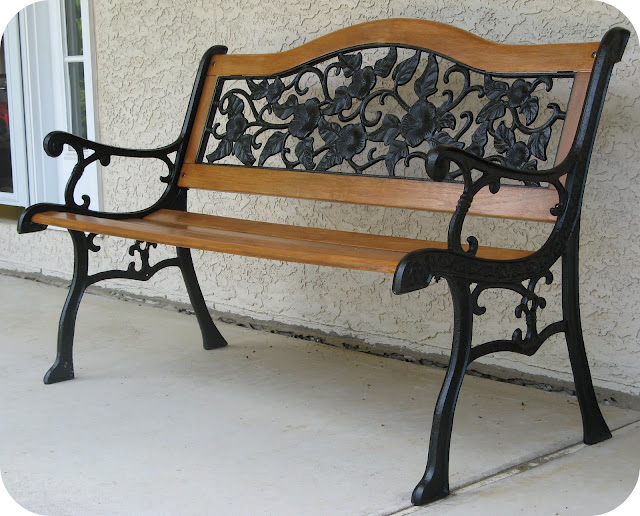
And here are the results. It looks like a brand new bench!
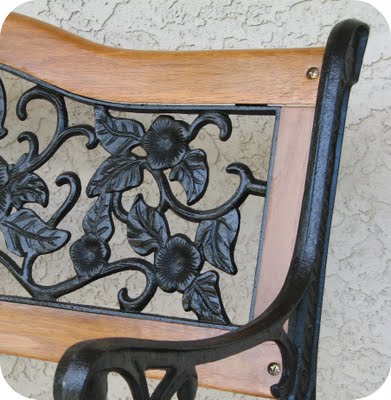
I couldn’t believe how much the flower detail popped when coated with glossy paint!
Thanks for letting me stop by Making Lemonade, and I hope you will gain inspiration from me – previously the least handy woman on earth – that all it takes is some research and a few trips to the store to gain confidence and make a big difference in your home.