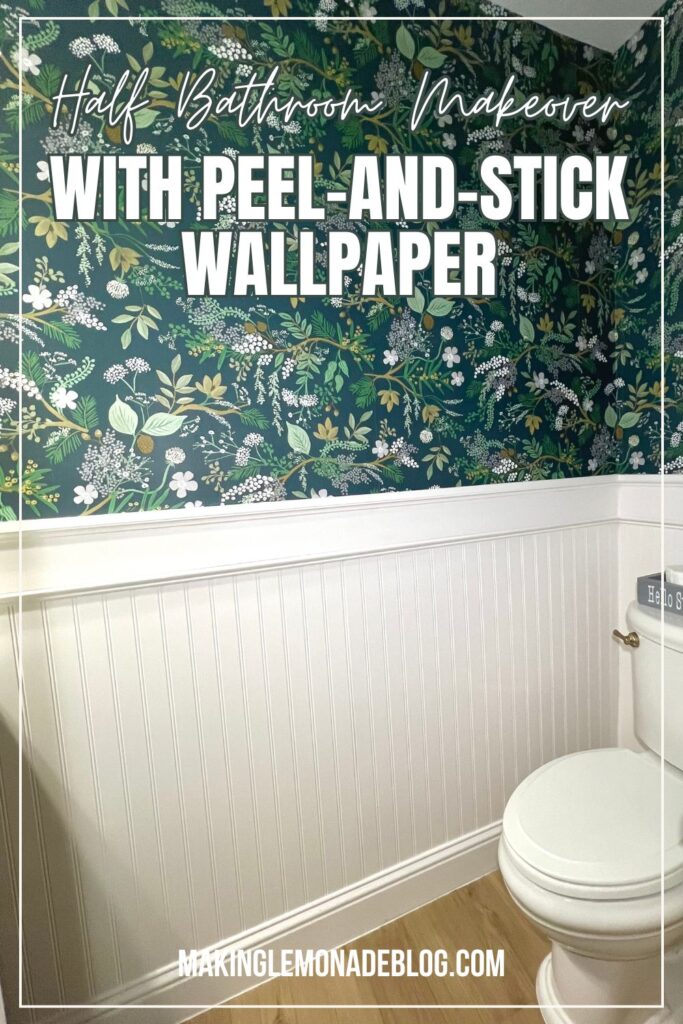
How to Install Peel & Stick Wallpaper for a Half Bath Makeover
This post may contain affiliate links for your convenience. Read my full disclosure policy here.
Instantly elevate your space with a peel-and-stick wallpaper! This tutorial walks you through tips and tricks to get the best results, plus all the tools and measurements we used for our project.

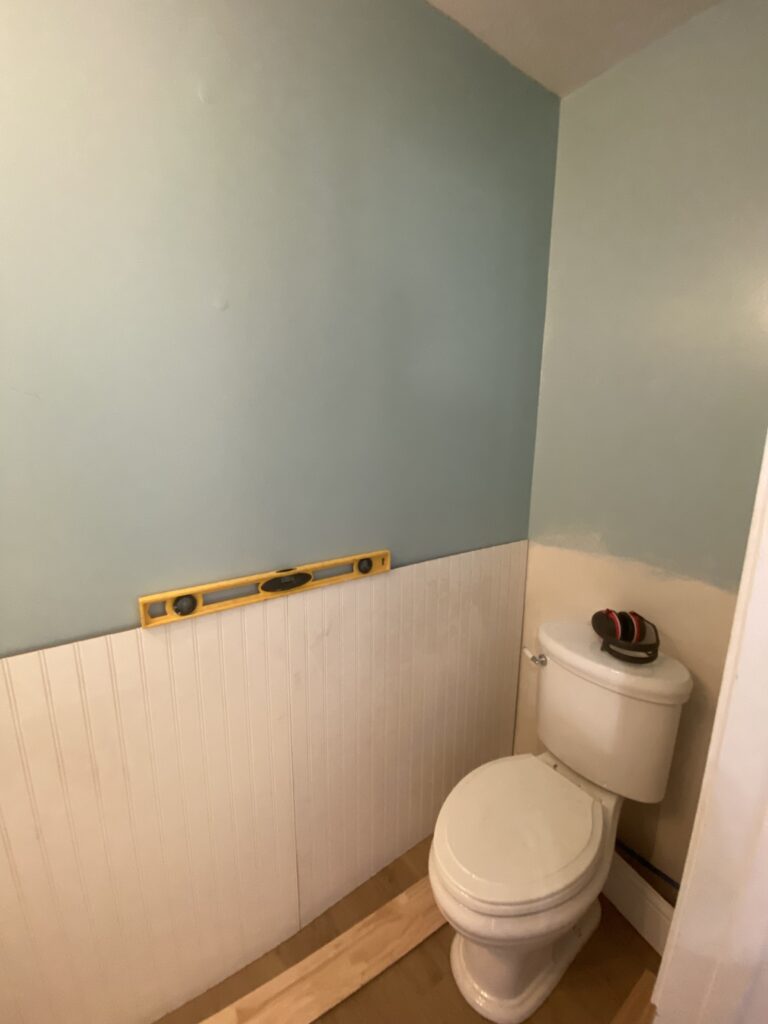
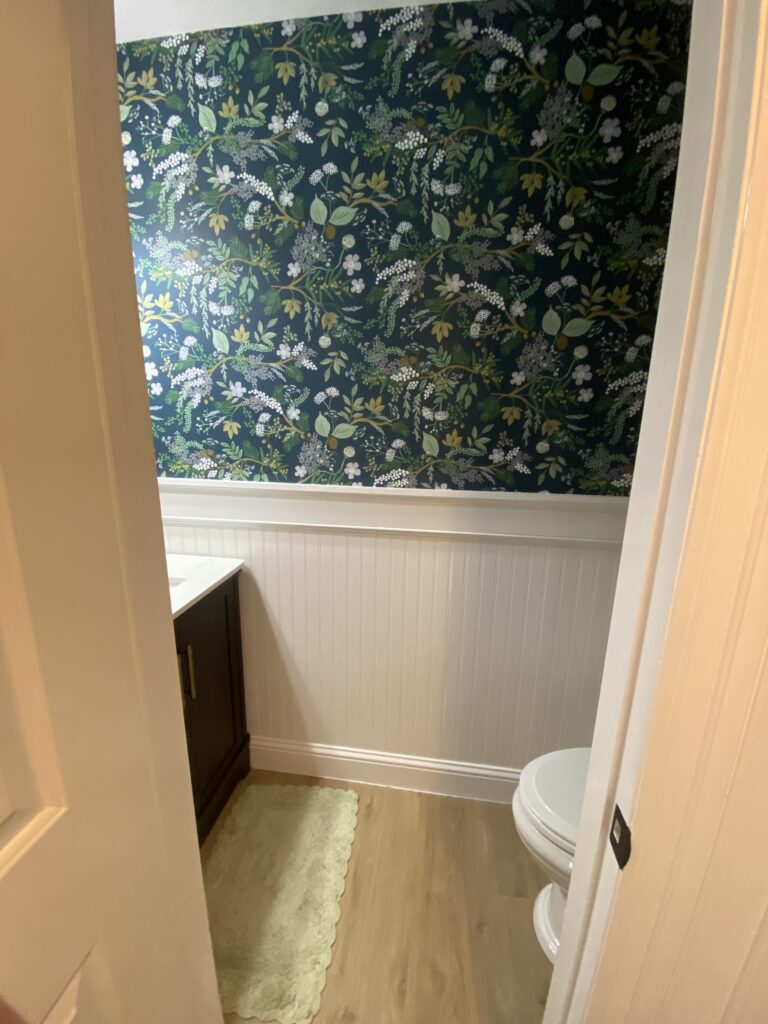
We had one of those “oh no” home moments: a major plumbing emergency that flooded a handful of rooms in our house, including our half-bathroom. Floors and walls had to come out, and new ones went in. In the messy middle of all that, I realized our bathroom (unchanged since our move-in) was begging for a makeover. So I decided to take the plunge. Check out the before and after of this makeover!

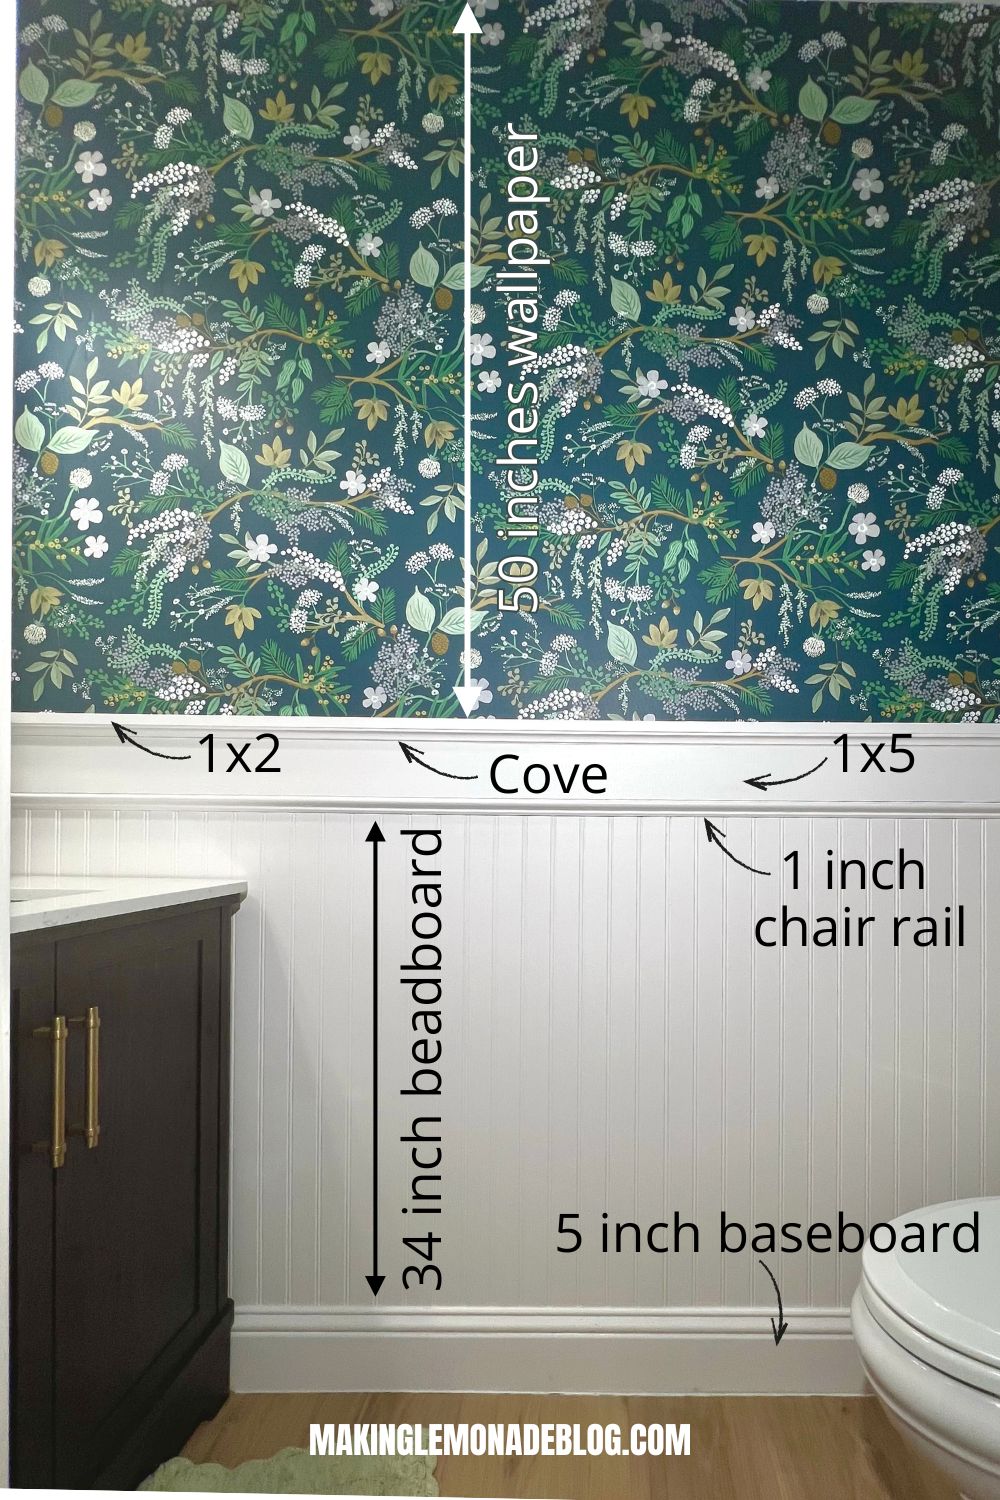
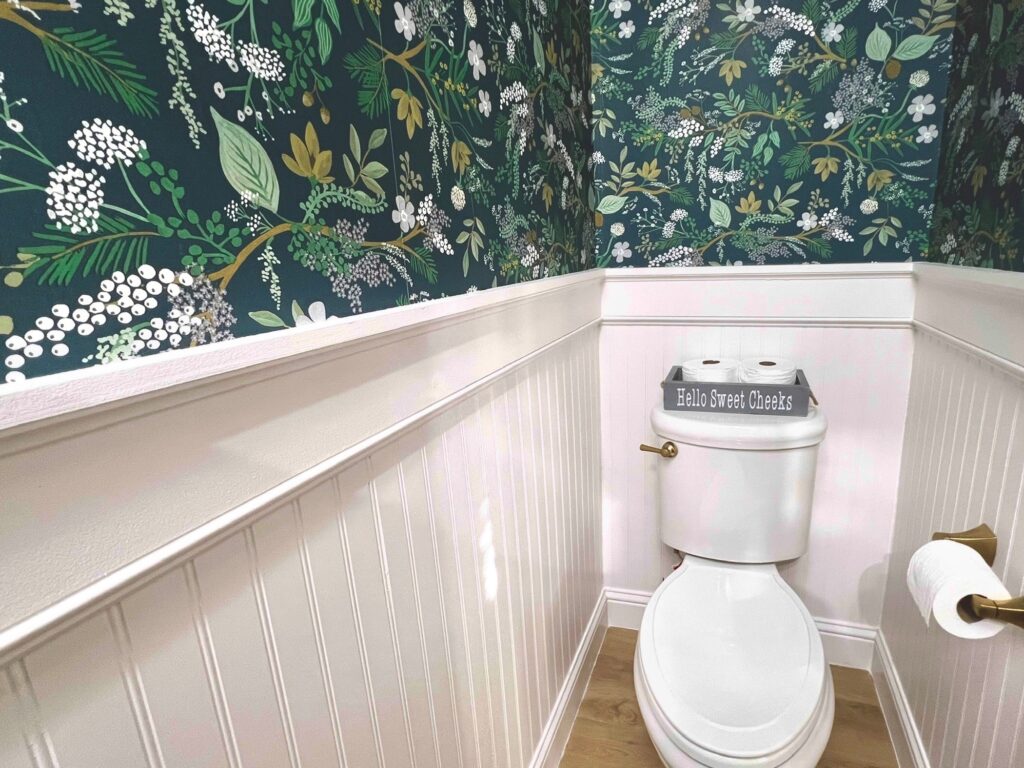
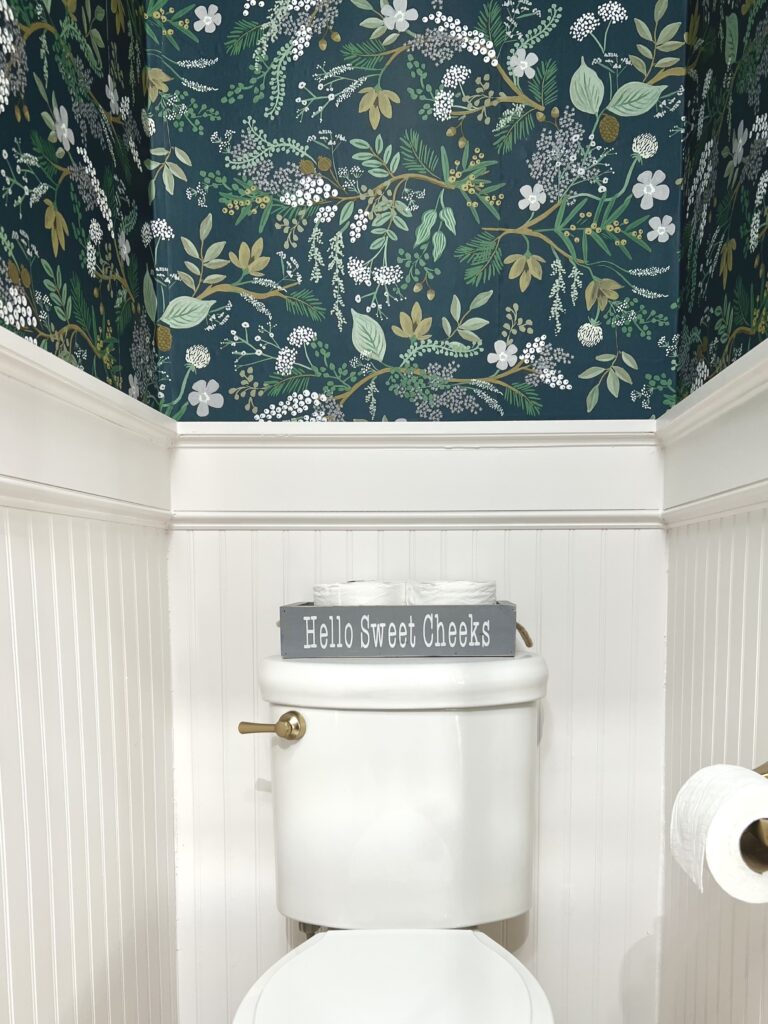
I’d been eyeing wallpaper options for our half bathroom forever, and once I found this stunning Rifle Paper Co. Juniper Forest peel-and-stick print, I was sold. I also knew I wanted paneling along the bottom half of the wall, and after talking it through with my handy hubby, we landed on this beadboard combo. If you want to recreate the look, this photo includes every piece we used, plus the exact measurements to make it easy to replicate.
A Quick (and very real) Disclaimer
If you’re planning to tackle this project with your significant other, make sure you’re not already in a fight before you start. Peel and stick wallpaper is stunning, but she is a tricky little beast and there’s definitely a learning curve in the beginning. Alignment, bubbles, pattern matching—let’s just say emotions can run high. For the sake of your marriage, your sanity, and your ability to look each other in the eye afterward, start this project in a good mood, with snacks nearby, and maybe a safe word.
Which Rooms Are Safe to Use Peel-And-Stick Wallpaper?
Before you fall in love with a wallpaper, it’s worth knowing where peel-and-stick wallpaper actually works best. Unlike traditional pasted wallpaper, peel-and-stick relies on adhesive that can loosen if it’s exposed to too much moisture, steam, or temperature fluctuation.
Spaces like bedrooms, living rooms, dining rooms, hallways, offices and half-bathrooms are perfect for peel-and-stick wallpaper. There are no showers or heavy humidity that could damage the adhesion. Refrain from using peel-and-stick in full bathrooms, kitchens and laundry rooms.
Peel-And-Stick Wallpaper Application Steps:
Prep your Wallpaper
Before you even peel the paper, give it time to acclimate. Lay out your rolls in the room where you’ll install them for about 48 hours so that the material adjusts to the temperature and humidity of that space. This helps avoid shrinkage or expansion after installation.
Gather your Supplies
Here’s what you’ll want on hand:
- Measuring tape
- Level or laser level
- Straightedge or metal yardstick
- Pencil
- Utility knife or fresh razor blade
- Plastic smoother or rubber-tipped squeegee (to press out bubbles)
- Soft cloth or sponge and mild soap solution
- Clean towel
- Step ladder
Having all your tools ready ahead of time ensures you’ll move smoothly once you start.
Prep Your Walls
Wall prep is key when applying peel and stick. The surface must be smooth, clean, dry, and free of dust, grease, or texture that could interfere with adhesion.
Here’s how we did it:
- Turn off power and remove outlet covers and switch plates (we’ll get to cutting around those in a later section).
- We checked for bumps, uneven texture or residual plaster/paint flaws and sanded modestly where needed.
- Wipe down the wall with mild soap and water (just a gentle cleaner) and then rinsed with plain water to remove any residual soap.
- Let the wall fully dry, at least several hours, if not overnight. Some sources say newly painted walls should cure for at least four weeks before applying peel-and-stick.
When you skip or rush the wall-prep, you risk adhesion failure, peeling, bubbles, or uneven seams.
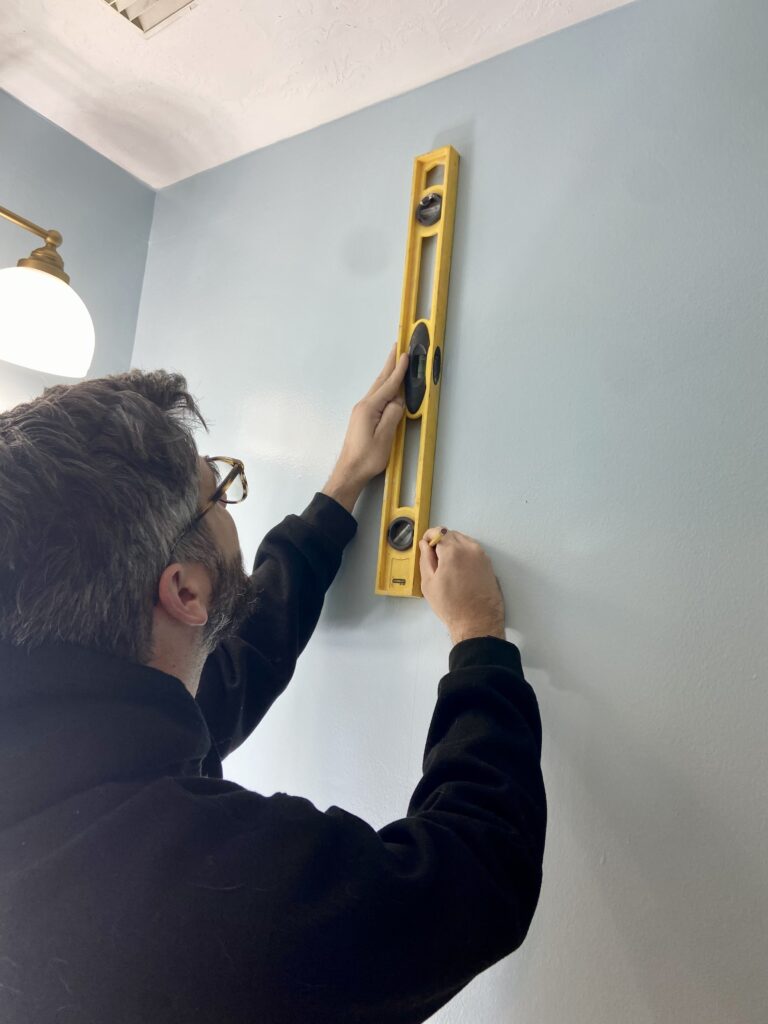
Mark Your Vertical Guideline
Before you hang your first strip, take a minute to mark a vertical guideline. This step is crucial for getting professional-looking results. Even if your wall or ceiling isn’t perfectly straight (and most aren’t), the guideline ensures your wallpaper goes up level, which keeps the pattern from drifting or looking crooked as you continue across the room.
To make sure the wallpaper overlaps slightly into the corner (instead of relying on the corner to be perfectly straight), you’ll want to measure before marking your guideline. First, measure the full width of your wallpaper roll, then subtract ½ inch. That new number is how far away from the corner your vertical guideline should go. For example, our wallpaper was 27 inches wide, so we marked our vertical line 26.5 inches from the corner of the wall. This gives the wallpaper just enough overlap into the corner while still keeping the pattern level as you continue across the room.
Measure and Cut Your First Piece
Here’s how we measured and cut for success:
- Measure the height of the area where the wallpaper will go (from ceiling line or crown trim down to the bottom of the area you are wallpapering).
- Add 2 inches extra height at the top and bottom (so you have extra to trim precisely later). This helps account for ceiling/wall unevenness and gives you wiggle room.
- Cut the roll to this length.

Apply and Smooth
Now comes the fun (and careful) part:
- Position your first strip at the top, aligning it with your vertical guideline and letting the 2 inches of extra at the top overlap the ceiling.
- Gently peel the backing away a little bit (about 12″ to 24″) and apply the top part of the panel to the wall.
- Using your smoothing tool (squeegee or plastic smoother) work from the middle of the strip outward toward the edges, pressing as you go. This pushes air bubbles out and presses the adhesive into the wall surface.
- Continue peeling the backing bit by bit as you smooth the wallpaper down, working from top to bottom slowly and steadily. Avoid rushing.
- If you spot bubbles: either gently lift that section and press again, or use the tip of a utility knife (or pin) to release the air and smooth it out.
Apply the Second Piece
Once your first piece is solid:
- Match the pattern (if your wallpaper has a repeat) by aligning the design on the roll with the first strip before cutting.
- Trim the second piece to height (again adding the 2 inches top and bottom).
- Position it so the seam is aligned neatly with the edge of the first strip—many installers slightly overlap the seam (~⅛ inch) to allow for any shrinkage.
- Peel the backing a little, align the pattern/design, then apply just like the first: top down, smoothing as you go.
- Use your smoothing tool to compress the seam area and ensure the edges meet snugly without lifting.
Working With Corners
It’s tempting to take a full strip of wallpaper and wrap it straight around the corner, but don’t do it! Corners are rarely perfectly square, and stretching the paper across them almost always leads to bubbling and peeling later. Instead, treat corners like a transition point.
Measure the distance from the edge of your last installed strip to the corner of the wall. Then add ½ to ¾ inch to that number and cut your next strip to that exact width. When you install it, press the paper firmly into the corner so it sits smoothly and slightly overlaps onto the next wall. This gives you a clean, professional look without stressing the wallpaper or risking it lifting over time.
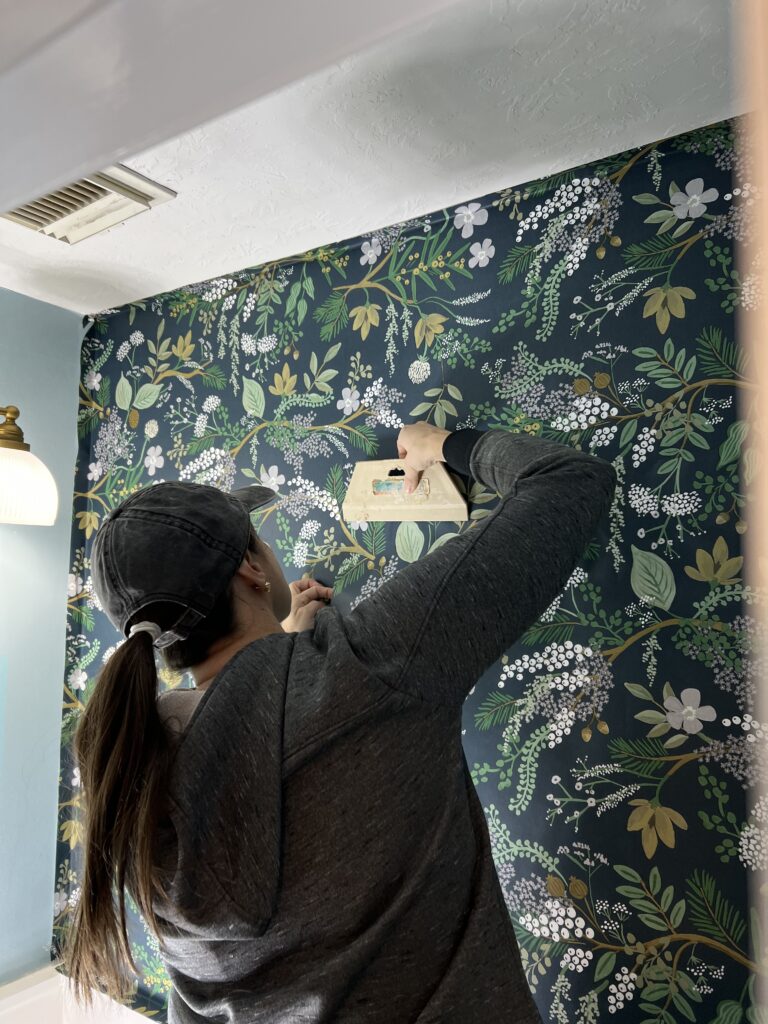
Cutting Around Outlets and Light switches
Electrical and switch boxes need precision and safety:
- With power turned off, remove the switch plate or outlet cover.
- Hold the wallpaper panel over the wall surface, smooth it into place around the outlet box area.
- Use a sharp utility knife and straightedge to carefully cut an “X” or a cross shape in the paper directly over the box. Press the flaps down neatly around the opening, smoothing into the wall surface. Then finish cutting the outline of the edges.
- Reinstall the outlet/switch cover (which will hide most of the cut edges).
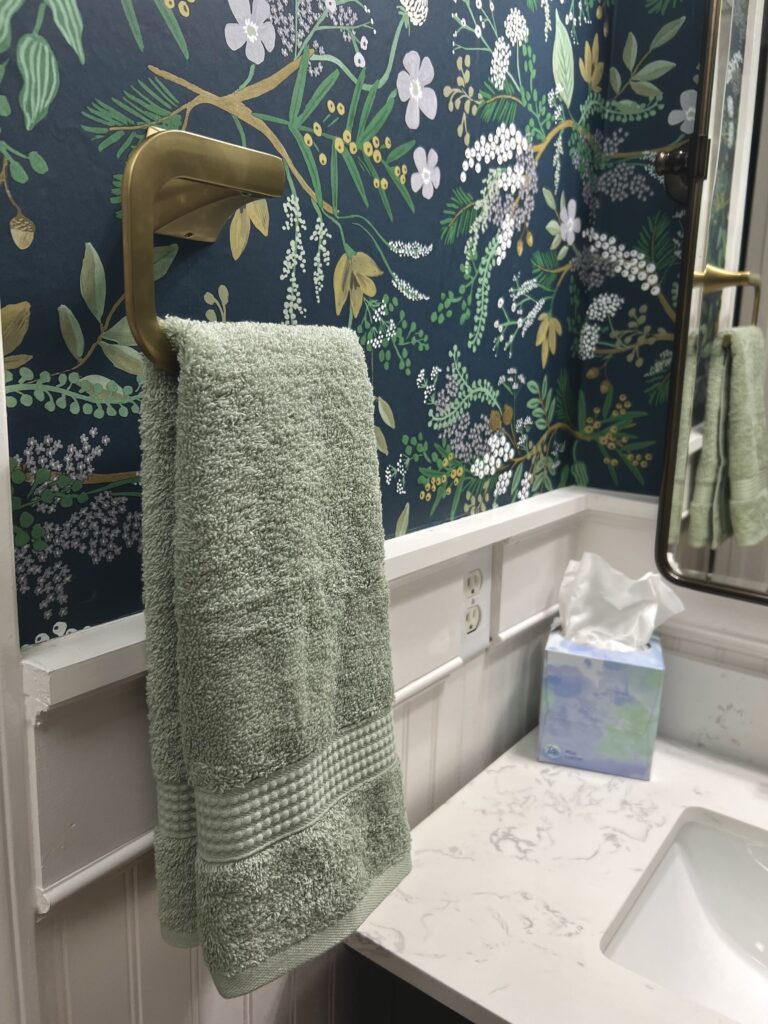
- Take down towel bars and toilet paper hardware prior to installing the wallpaper. Cutting around these items is tricky and not worth the headache.
Other helpful tips & tricks
- Order extra: It’s always smart to purchase more wallpaper than you think you’ll need (for pattern matching, mistakes, future repair). I used the extra we had to line some dresser drawers and it worked out beautifully.
- Check lot numbers: If your rolls come from different dye lots, the colors may vary slightly. Check before hanging.
- Avoid application on very fresh paint: Newly painted walls may not provide optimal adhesion—many recommend waiting 4 weeks.
- Start your first panel carefully: If your first piece is crooked, everything else will follow that mistake. Many pros recommend making your first strip perfect and centred (or starting from an inconspicuous wall).
- Keep your blade fresh: When trimming, a dull blade can tear the paper or make jagged cuts—replace the blade often.
- Work slowly: Rushing will lead to bubbles, misalignment, stretched pattern. Smooth as you go.
My Dirty Little Secret
Okay, real talk — I really struggled with getting that very first strip perfect. Peel-and-stick wallpaper is designed to be repositioned, but I pulled mine back and reapplied one too many times, and it stopped sticking as well as the others. No matter how much I smoothed, I kept getting stubborn bubbles. And because I didn’t have enough leftover wallpaper to scrap the whole piece and start fresh, I had to get creative.
I grabbed some spray adhesive from my stash, gently peeled back the problem section, and worked a little at a time — spray a few inches, smooth a few inches, repeat. While I’m sure this isn’t the manufacturer’s recommended method, it worked beautifully. The paper laid flat, the bumps disappeared, and you’d never know that first strip gave me such a hard time.
The Details That Brought it All Together
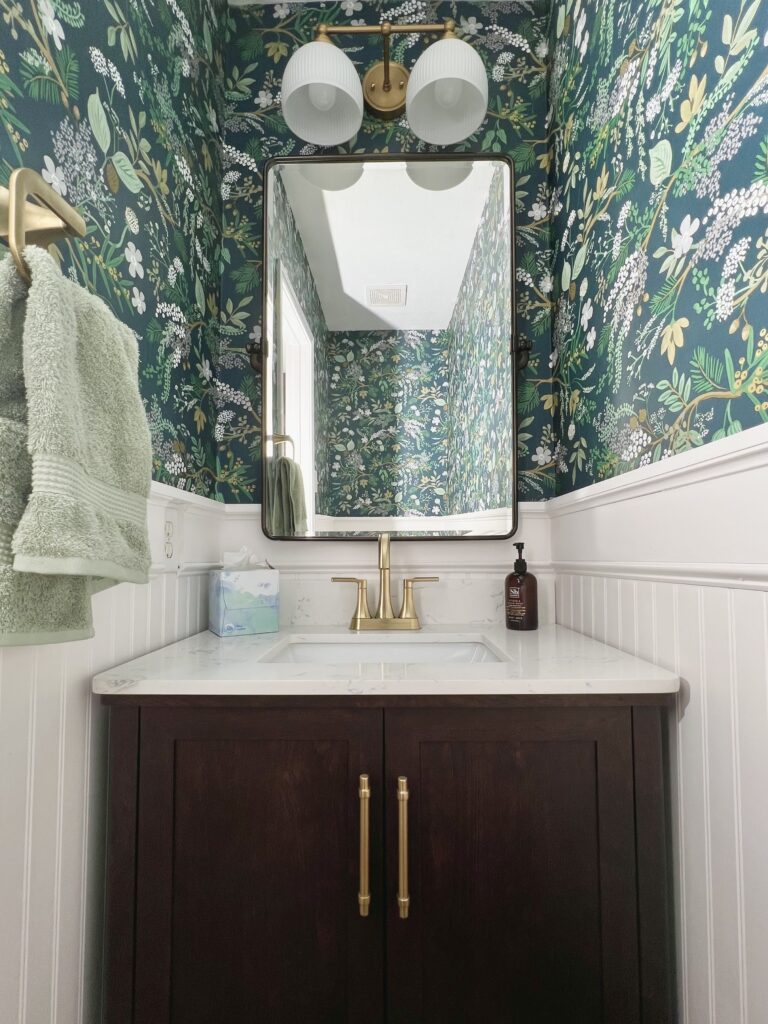
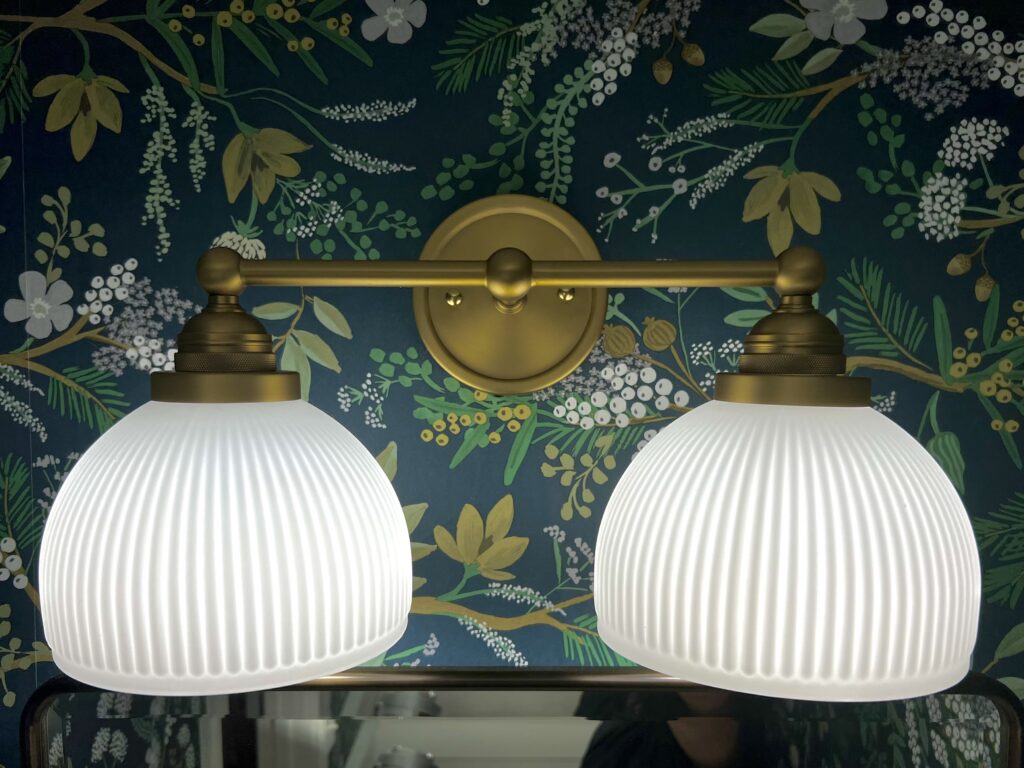
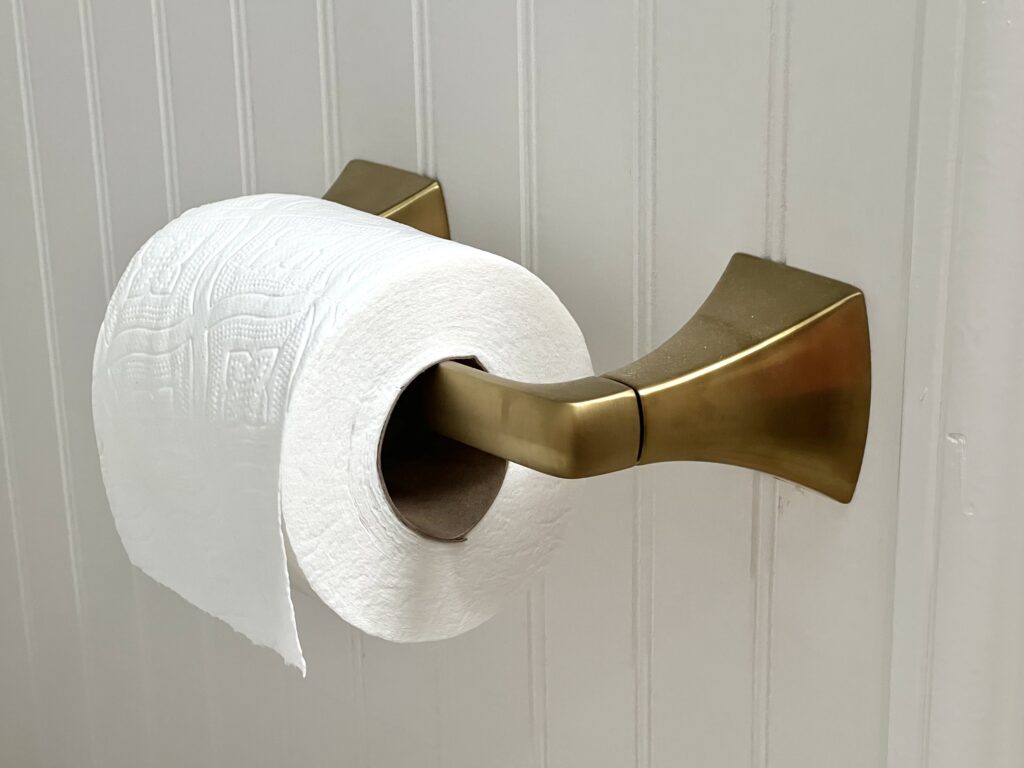
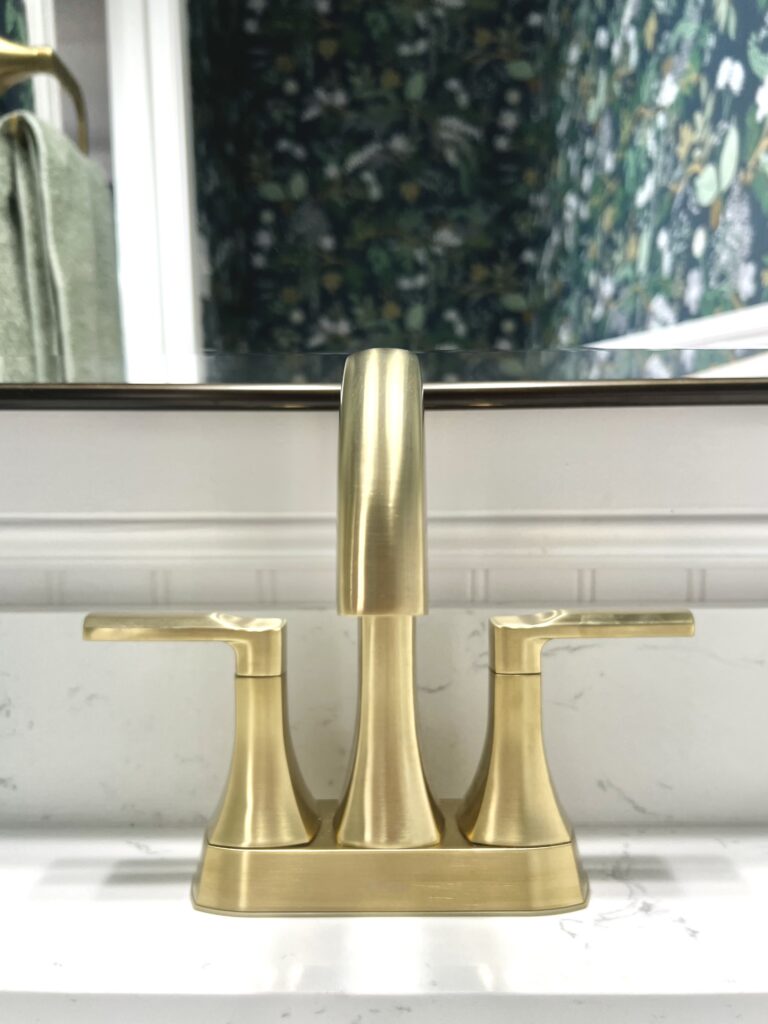
You know I’m a gold girl through and through, so I was thrilled when the gold hardware tied in perfectly with the tan branches and pinecones in the wallpaper. We even swapped out the toilet handle — such a tiny change, but it made a surprisingly big impact. I added an oil-rubbed bronze mirror frame to break up all the gold just a bit, and the darker tones pair beautifully with the dark walnut on the vanity. It’s those little details that really finished the space and made everything feel intentional.


The Silver Lining of our Plumbing Disaster
In the end, it still makes me laugh that a plumbing catastrophe is what finally pushed this little bathroom to the top of the priority list, but I’m so glad it did. What started as chaos turned into a space that now feels thoughtful, cozy, and truly us. And while peel-and-stick wallpaper definitely has its quirks, I hope sharing what we learned along the way helps your own project feel a little less intimidating and a whole lot smoother. Whether you’re tackling a tiny powder room or a larger space, a little prep, and a lot of patience, really does go a long way. Here’s to turning unexpected messes into something beautiful.
Looking for more budget-friendly home ideas? You’ll love these Stylish Entryway Makeover Ideas and Transforming your Porch with Outdoor Curtains.