8 Tips for a Fabulously Organized Kitchen
This post may contain affiliate links for your convenience. Read my full disclosure policy here.
Before we planned our renovation, I took a few hours to really get our kitchen organized. Clearing out unused items and organizing things effectively a few months in advance made planning our renovation (and surviving the process) much easier. Plus, now I have bragging rights that I know which kitchen tool is where at any given time, no matter how many martinis I may have imbibed.*
*usually, A LOT OF THEM.
Here’s a few strategies that helped whip our kitchen into organizational shape. These easy organizing ideas were essential in saving tons of time and finding extra space in the kitchen!
1. Weed out unused items.
The very first step is to look at what you have, what you need, and what you don’t need anymore. In other words, it’s time to ditch the four extra spatulas and the broken veggie peeler. In our home, we really do use a lot of spatulas but I had a few that were old and certainly I didn’t need 7 of them. It’s a good time to treat yourself to new kitchen tools, too. {Insider Tip: take advantage of Bed, Bath, & Beyond coupons. They don’t actually expire, and you can use one per item at checkout. HUGE money saver!}
2. Create zones.
By far this was the most important step in getting our kitchen running smoothly. Think of your kitchen as having ‘zones’: baking items, chopping/meal prep, pots & pans, coffee & tea station, food storage, things we drink out of, things we eat off of, serving items, etc. Once I did this, creating space for everything was much easier– as was finding things quickly! Instead of wondering where I put my electric mixer I’d simply go to the baking zone. Prepping meals was a snap because my knives and cutting boards were right there next to the sink. Pie server? In the serving utensil drawer, of course! {OF COURSE.}
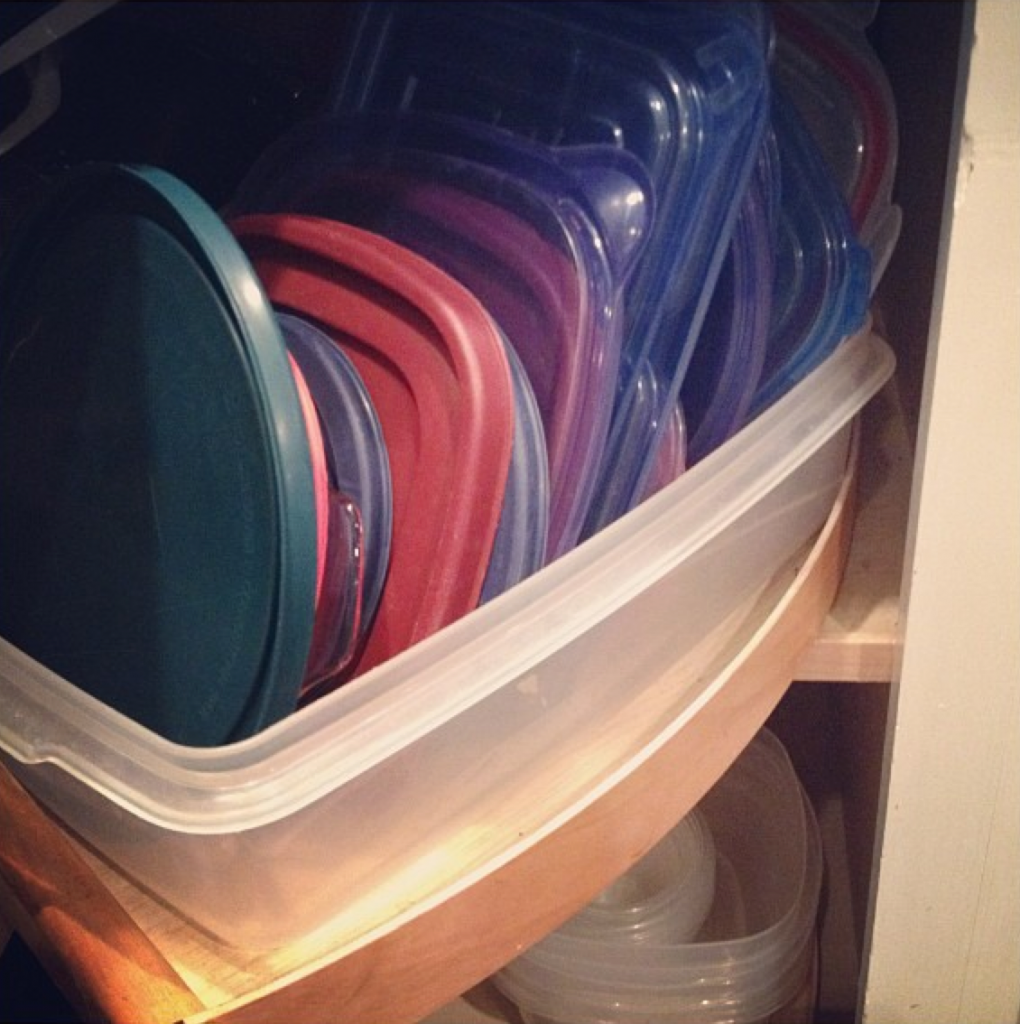
3. Group like items.
This might sound redundant after #2, but bear with me. Grouping like items within your zones makes lots of extra room because they have a similar shape, and things are easier to find. I keep all my plastic lids in the lid area, and I never have to search for them. Cans grouped together are easier to stack and to tuck against each other. Casserole dishes grouped together and nested within each other makes it so much easier to put your hand on the correct size. Lids of a feather, stack together!*
*sorry, I’m getting punchy
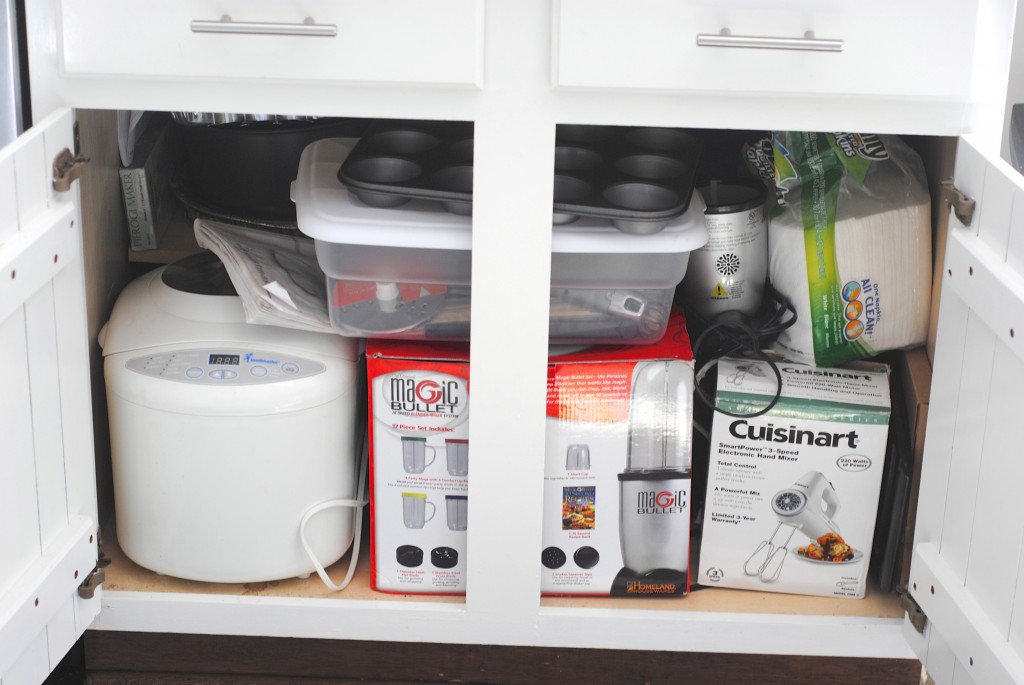
4. Place frequently used items close at hand, and infrequently used items further away.
Again, this isn’t rocket science. But here’s an illustration of what I mean:
Items I use infrequently are above the refrigerator, towards the back of drawers, above the cabinets. Heck, I even store turkey prep items in a bin in the basement since I use them but once a year! But my cutting boards and knives are right within reach, as are potholders and our everyday dishes. Once I organized my kitchen items into zones, and then by frequency of use, I realized how much time I’d been wasting digging things out or searching for ‘lost’ kitchen tools. This was an ‘aha’ moment for me. Sadly.

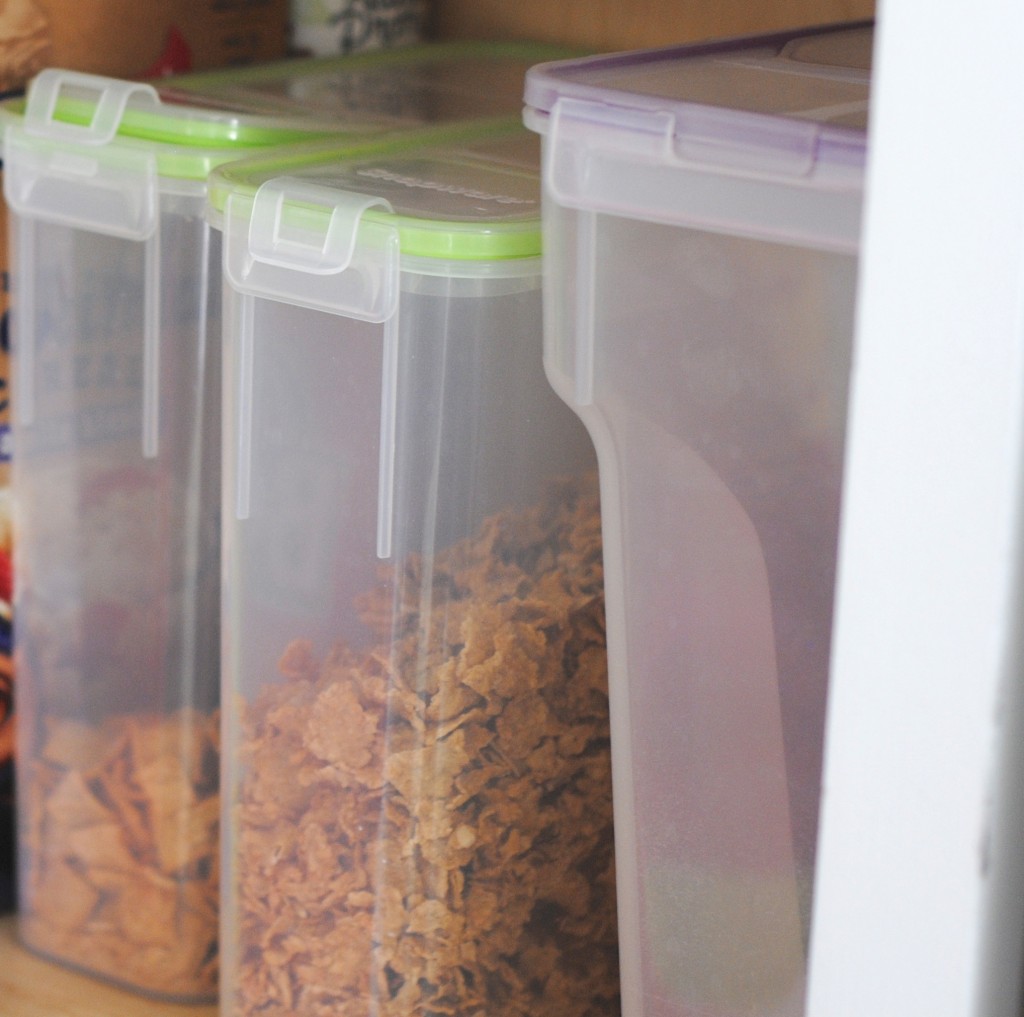
5. Decant your food into baskets, bins, and see-through containers.
When I get home from the grocery store, instead of unloading boxes and bags into my cabinets I open them up and take wrapped items out. Snack bars, raisin boxes, and snack packs go into bins. Flour and sugar go in snapware containers. Cereal? Cereal keepers. Not only does this create more room but it can keep items fresher when stored properly in airtight containers. BONUS? I can easily see what’s running low and I add it to my grocery list.
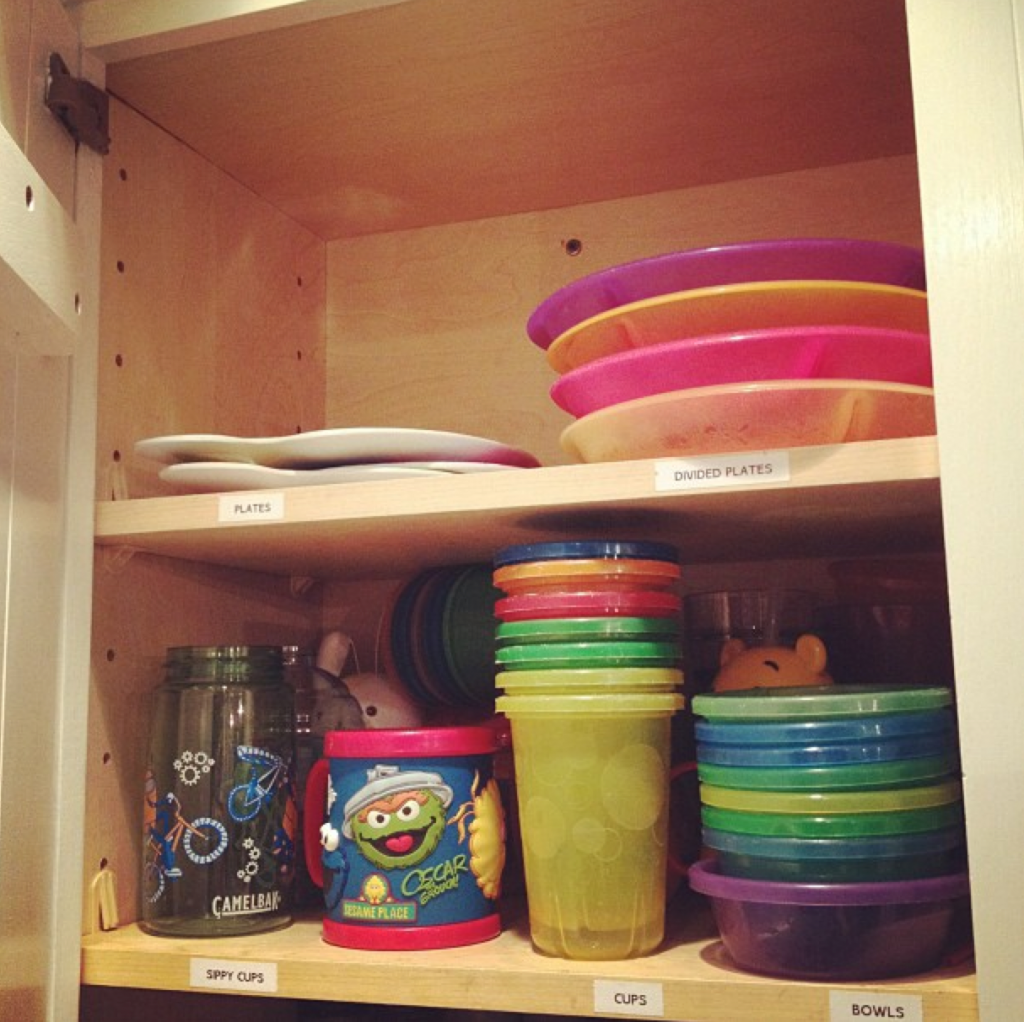
6. Label, label baby!
Do it. I don’t care if your husband and friends laugh at you (oh, they sooooo do) but if it makes you feel better label your shelves. Now when you’re tired and putting things away you don’t even have to think where things go. Or, when your husband or mother-in-law puts dishes away they’ll know where they go. This WORKS, people! It’s worth being the butt of labeling jokes. {tee hee! I said butt!}
This is my favorite label maker, by the way. I’ve been known to cuddle him and whisper sweet nothings when I think no one is looking.
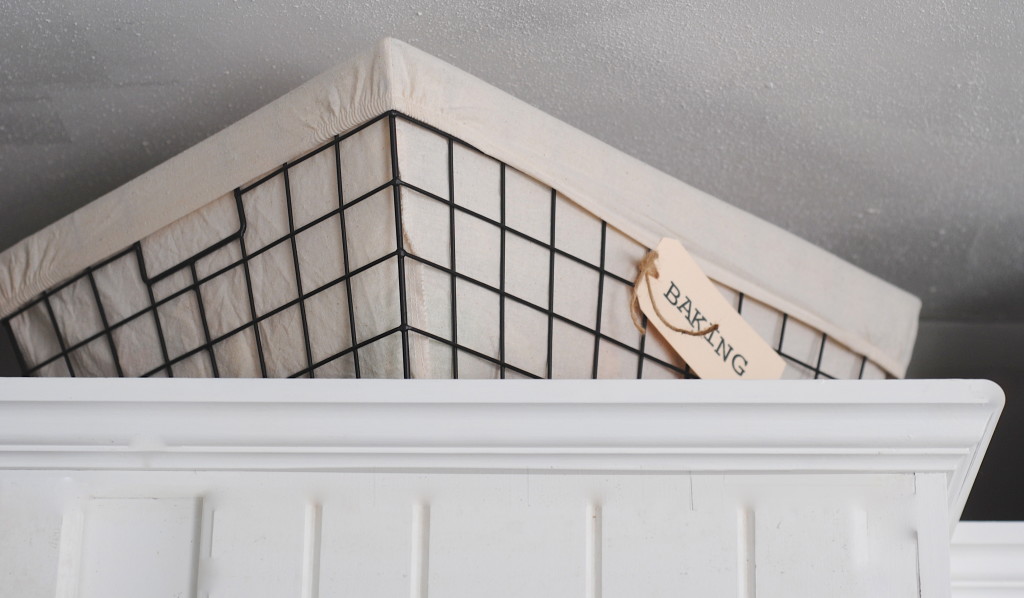
7. Make use of previously wasted space.
You? YOU ARE A GENIUS. I know this. For example, look around your kitchen right now and I bet you’ll discover places you can store things. Look above cabinets, are they begging for baskets?
Look where I now store my oven mitts– within reach of the stove. They are bulky and don’t fit well in the drawer, and it’s only when I look at photos does it bother me that they look like creepy disembodied hands. But the other times I look at them in real life I totally appreciate them there.
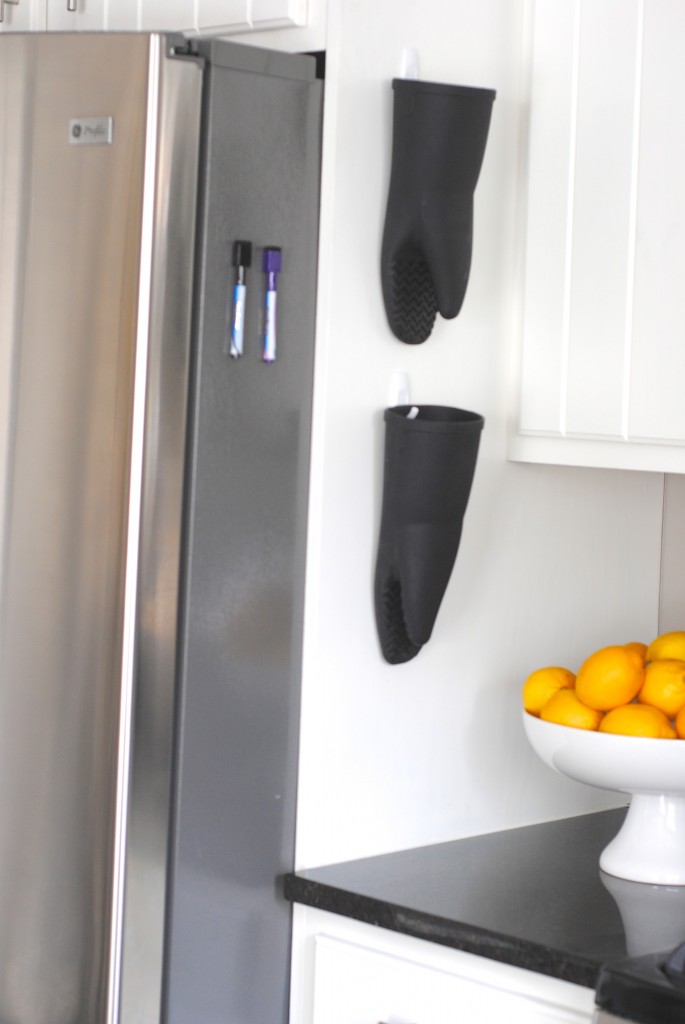
Got any ceiling space? Use it to hang pots and pans. Now you’ve just freed up an entire cabinet. See, you genius you?
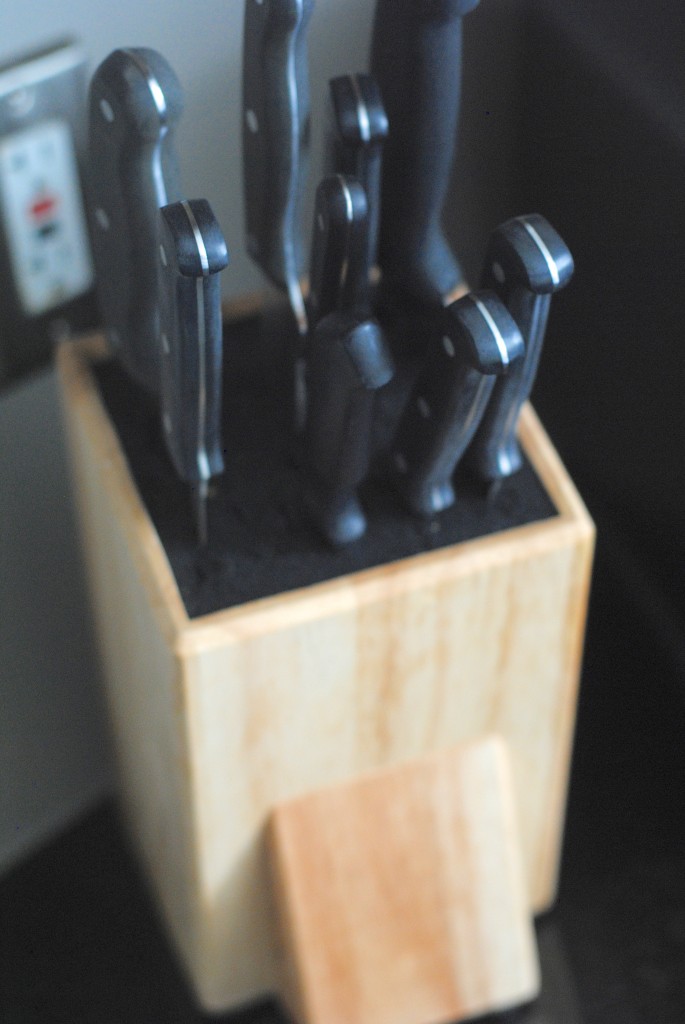
8. Evaluate what works and what doesn’t, and fix it.
This is good to do before you organize anything in your kitchen, but also a month or two after as well. A pre and post evaluation allows you first to overhaul your system, and then tweak it. For example, during my initial organizational binge I realized my knife block wasn’t working for me– the slots weren’t the right size, I couldn’t find one to also hold my steak knives, etc. Then I found the Kapoosh Knife Block, and KAPOOSH, my knives were happy again. (Here’s my unsponsored Kapoosh review, I’m still totally in love!)
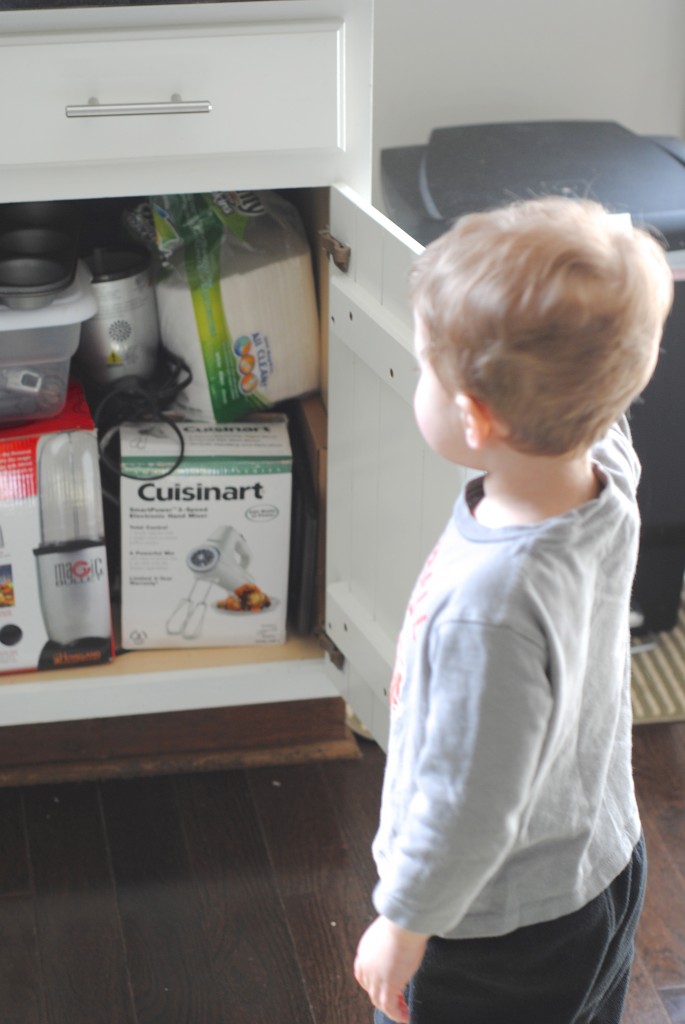
After I organized my kitchen, I realized there were sharp items in drawers like skewers and Cuisinart blades the kids could still reach (the stinkers), so I corralled them in a latched Tupperware bin in a locked cabinet to deter them. Well, mostly deter them.
Sometimes spicing up your kitchen simply means organizing it in a way that saves you time, makes you more efficient, unclutters your kitchen counters, and makes you a cooking Goddess (not that you weren’t one already, obviously). Life might be chaotic, but at least I know where my pie server is darnit!

What’s your #1 kitchen organization tip? And what’s for dinner tonight? Seriously, I need some ideas now that I’m ready to cook like a rockstar.
{ Linking up with: Home Stories A to Z | Tatertots and Jello }