How to Make a Beautiful Charcuterie Board
This post may contain affiliate links for your convenience. Read my full disclosure policy here.
A simple guide to creating a beautiful, delicious charcuterie board with easy ideas for choosing meats, cheeses, fruit and extras, plus fun tricks for arranging everything so it looks fancy without a lot of fuss.
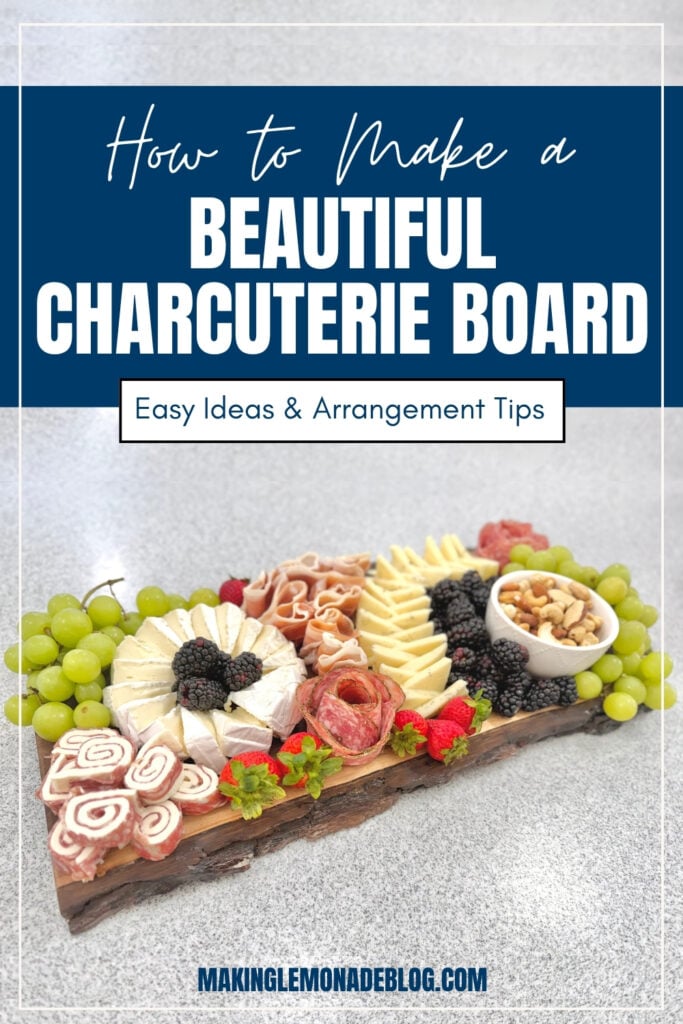
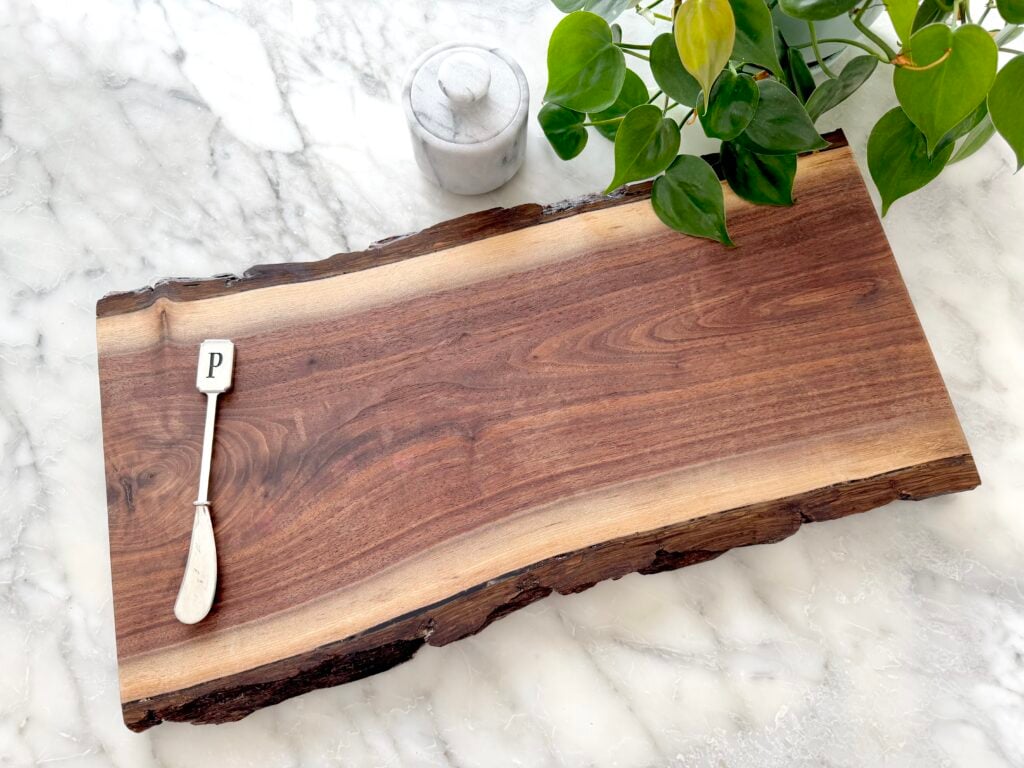
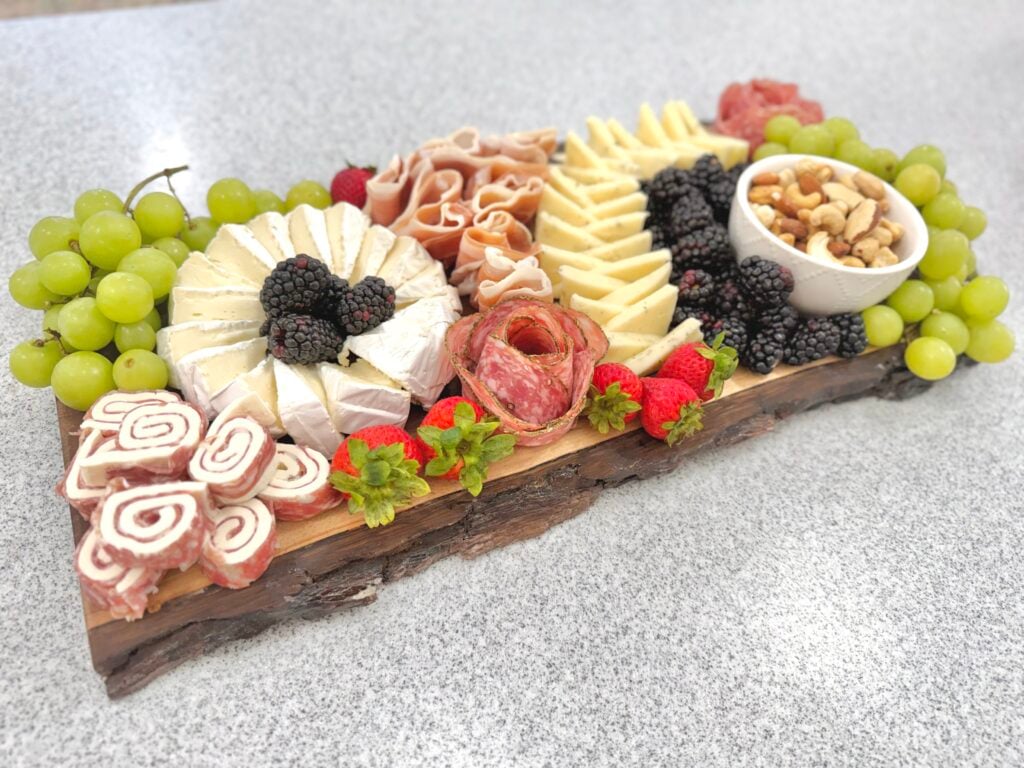
My step-dad made me the most beautiful charcuterie board as a gift, and naturally, I immediately decided I needed to put it to good use. Because when someone gives you a gorgeous board like this, you can’t just let it sit in a cabinet looking pretty. That would be wasteful.
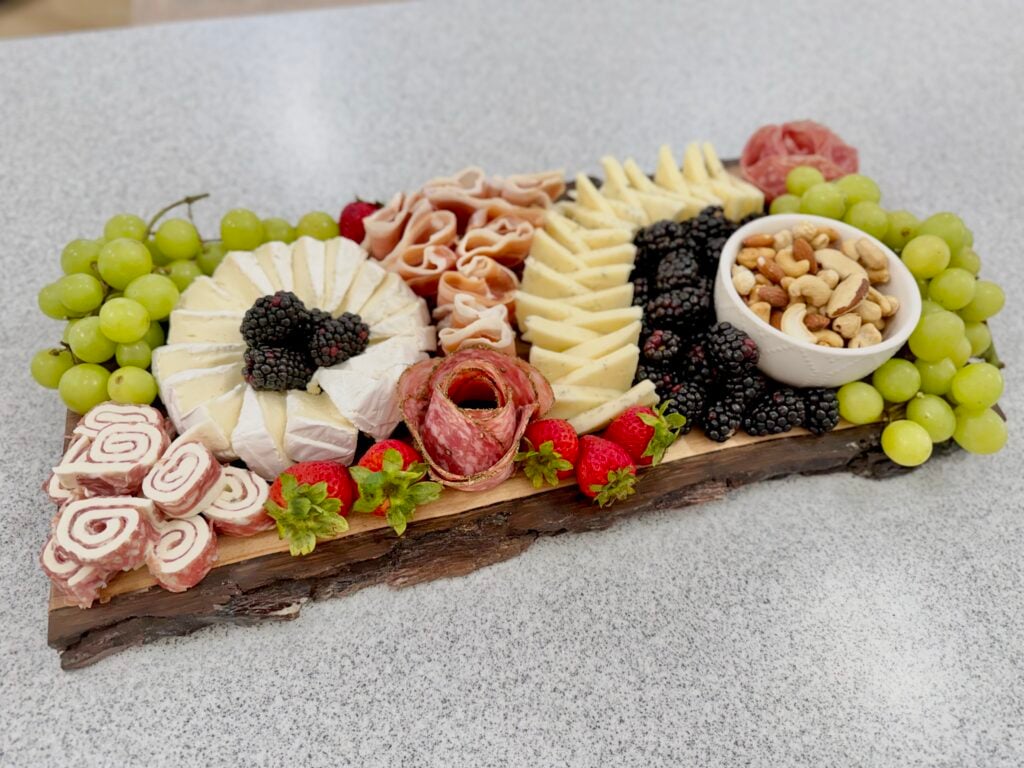
So I pulled out some of my favorite meats, cheeses, fruit and a few other goodies and put together a charcuterie board that looked fancy without actually being all that complicated to make. And that is really my favorite thing about a good charcuterie board. It looks like you put in WAY more effort than you actually did.
Whether you’re making one for a party, a holiday, a girls’ night, a date night at home or just because you bought a really pretty cheese board and need an excuse to use it, here’s how to make your own.
What to Put on a Charcuterie Board
There really aren’t many rules when it comes to what belongs on a charcuterie board. But if you’re feeling overwhelmed you can start with the rule of 3. Grab 3 meats, 3 cheeses, 3 breads, crackers or pretzels and 3 extras (think fruit, veggies, jams, olives, nuts, honey, etc.).
For my board, I used fruit, meat, cheese and nuts. I served my crackers on the side, rather than putting them on the board. There are endless possibilities for these boards, but here are some ideas to get you started:
Meat
Choose two or three different types of cured meats with different shapes and textures. Some good options include:
- Salami
- Genoa salami
- Soppressata
- Pepperoni
- Prosciutto
- Capicola
- Summer sausage
- Dried sausage
- Coppa
You don’t need a huge variety. A couple of different meats is plenty, especially if you’re also filling the board with cheese and fruit.
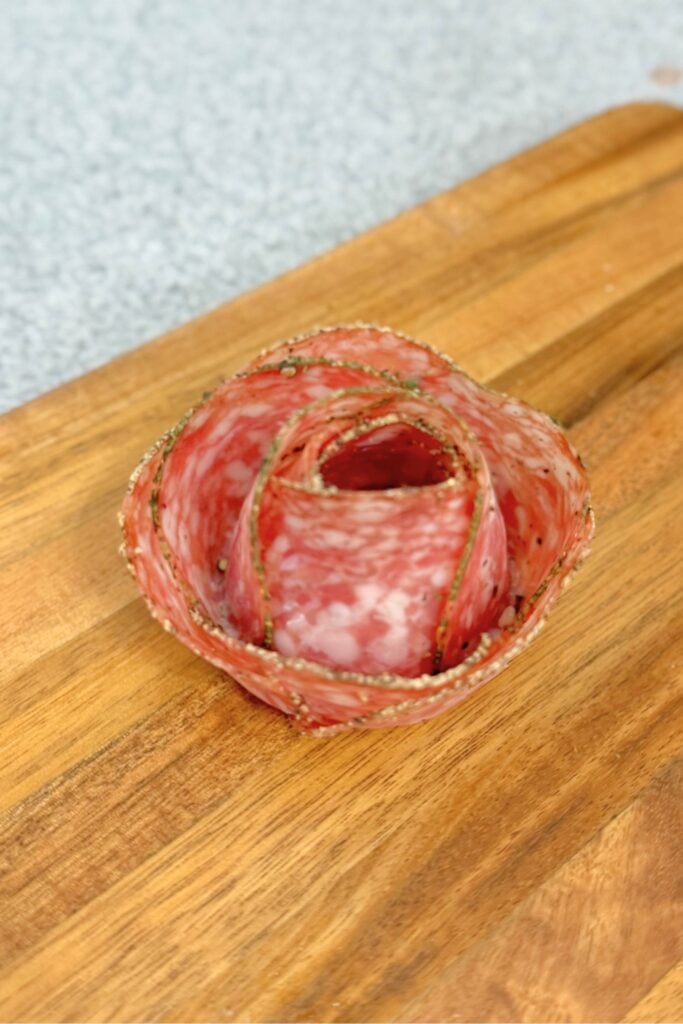
How to Make a Salami Rose
A salami rose looks fancy, but it is surprisingly easy. You need thinly sliced salami and a small round container. A shot glass works perfectly, but in my house we are apparently not shot glass people. So I used the lid from a cocktail shaker. Honestly, use whatever small round container you have. The important thing is that it is roughly the right size to create the shape.
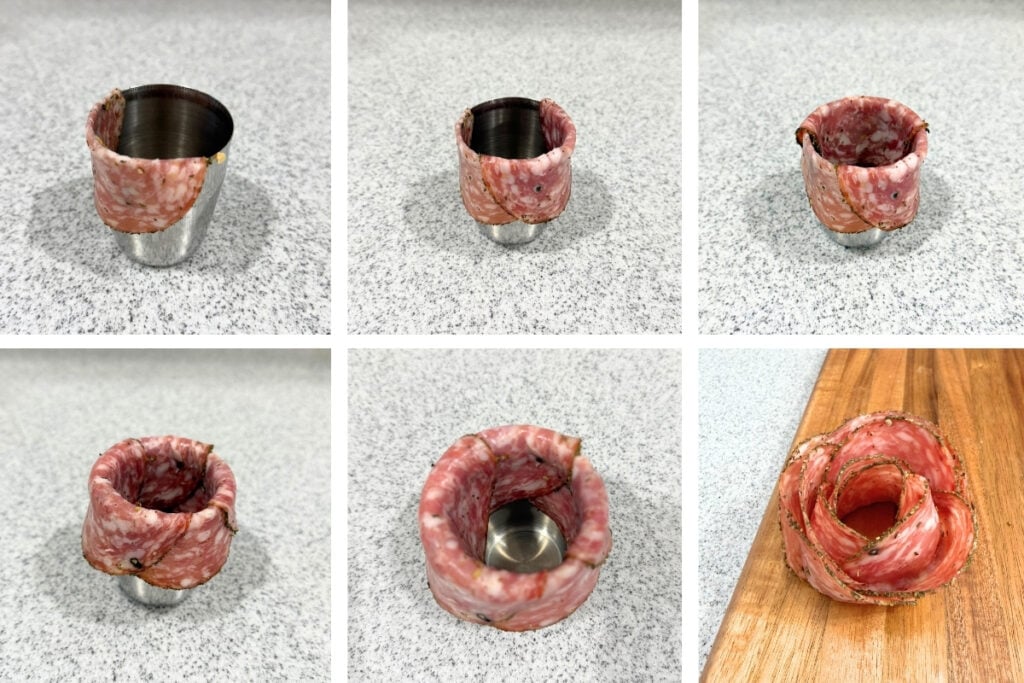
Here’s how to make it:
- Place one slice of salami over the edge of the container so that about half of the slice is inside the opening and half is hanging over the outside.
- Add another slice next to it, overlapping the first slice slightly.
- Continue adding salami slices around the entire opening, overlapping each slice as you go until you’ve used 6 pieces of salami.
- Once you’ve used six slices, gently press the slices together so they hold their shape.
- Carefully flip the container over onto your board.
- Lift the container away and you’ll have a little salami rose.
It looks much more complicated than it actually is, which is exactly what we’re going for here. You can make one large rose or several smaller ones and tuck them around the board.
Make your prosciutto pretty
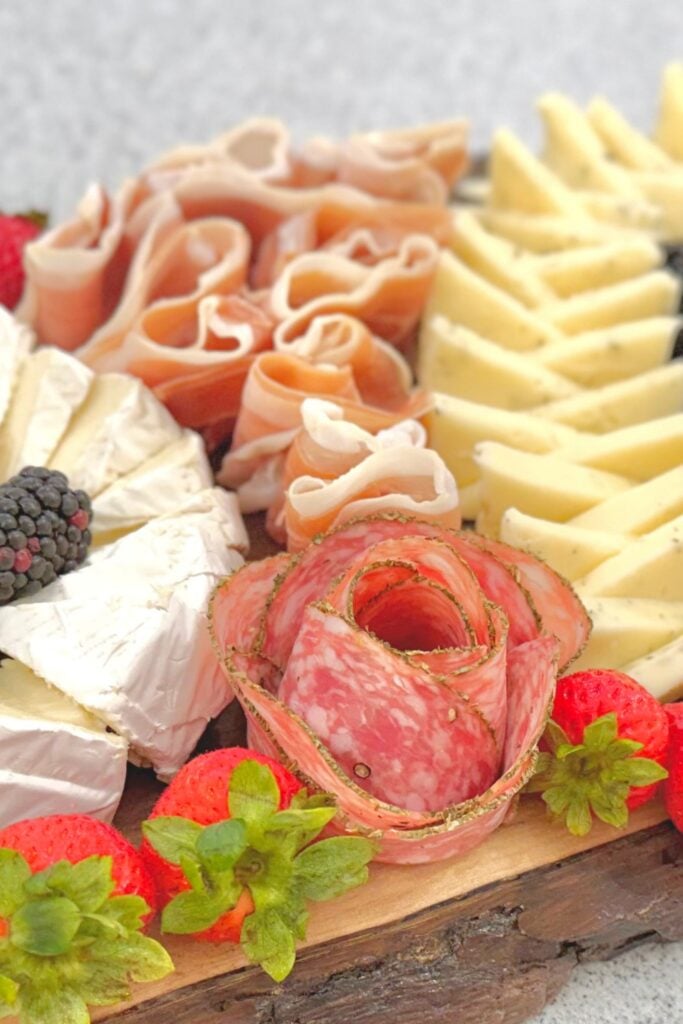
Prosciutto is delicious, but it can look a little sad if you just pile it into a heap. There are several ways you can fold it to make it look more intentional.
For my board, I folded the prosciutto in half lengthwise first. Then I folded it accordion style a few times and fanned it out slightly. The result was this pretty, wavy shape that added some movement to the board.
It doesn’t have to be perfect. In fact, I think prosciutto looks better when it has a little bit of a messy, ruffled look.
Cheese
This is where you can have a little fun. Try choosing different types of cheese with varying flavors, textures and shapes. A combination of hard cheeses, soft cheeses and creamy cheeses makes the board more interesting. Some good choices include:
- Brie
- Cheddar
- Gouda
- Colby Jack
- Havarti
- Pepper Jack
- Swiss
- Manchego
- Parmesan
- Goat cheese
- Blue cheese
If you’re serving a crowd, I usually recommend having at least one familiar cheese that isn’t too adventurous. Not everyone wants to be surprised by their cheese. For my board, I used a round wheel of Brie, block of havarti and mozzerella.
Cutting blocks of cheese
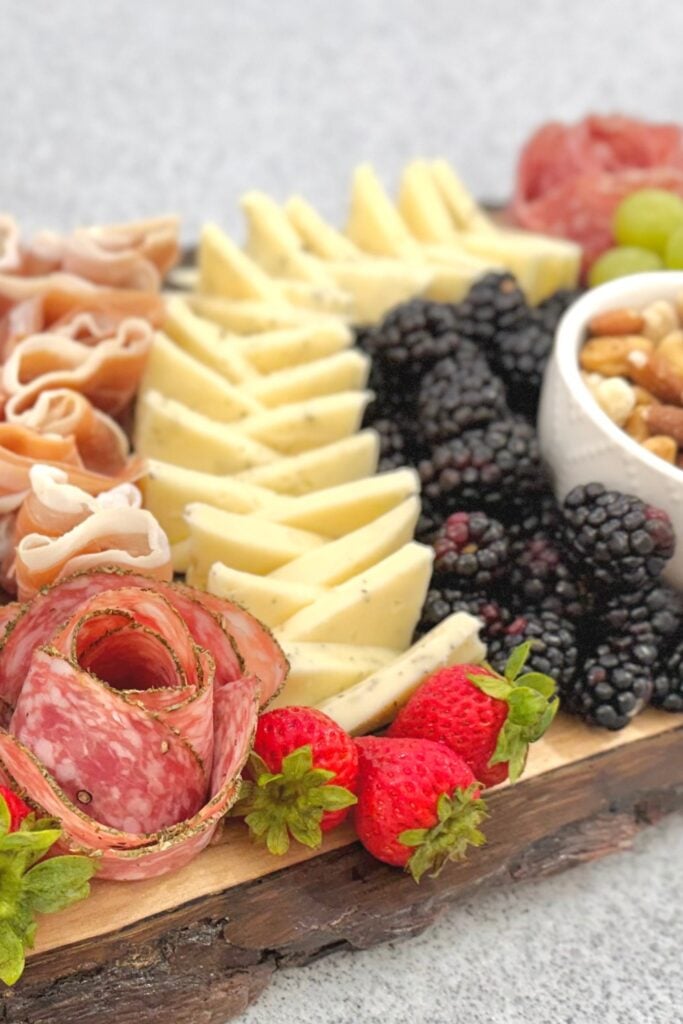
An easy way to make your charcuterie board look a little more interesting is to change the shape of your cheese. Start with any rectangular block of cheese and cut it into even rectangular pieces. Then cut each rectangle diagonally to create right angle triangles. Arrange the triangles on their sides, alternating the direction of each piece as you go. This simple little trick adds more shape, texture and visual interest to your board than simply laying out traditional rectangular slices.
A little tip about Brie
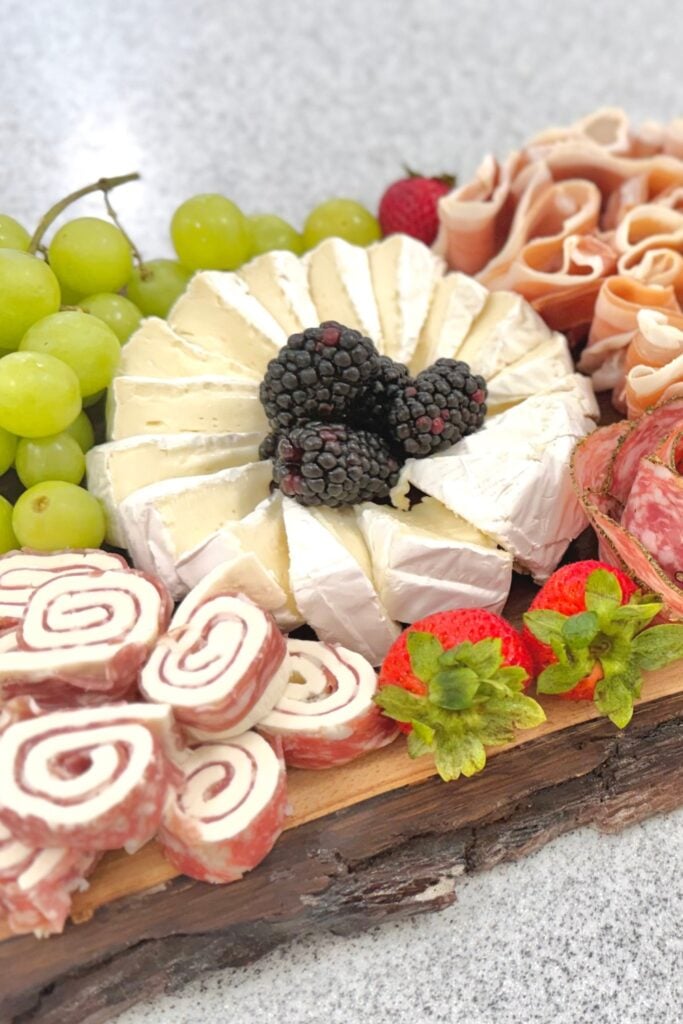
If you’re serving a whole wheel of Brie, it can be a little awkward for guests to cut themselves. The rind is the firmer outer layer around the soft cheese, and cutting through it quickly with a serving knife can be a little tricky, especially when people are standing around a food table trying to serve themselves.
I like cutting the Brie into even triangle pieces ahead of time. Then I arrange the pieces in a circle, tilting them slightly on their sides and overlapping them as I go. It creates a pretty, fanned out look while making the Brie much easier for guests to grab and enjoy. Plus, it saves everyone from wrestling with a whole wheel of cheese and a tiny cheese knife. Throw a few blackberries, blueberries or raspberries in the center for a fun pop of color and texture in the middle of your brie.
Fresh and Dried Fruit
Fresh fruit adds color, sweetness and freshness to the board, and it makes everything look prettier. Some of my favorite fruits for a charcuterie board are:
- Grapes
- Strawberries
- Blueberries
- Raspberries
- Blackberries
- Apples
- Pears
- Figs
- Dried apricots
- Dried cranberries
- Orange or mandarin slices
- Melon
When I choose the fruit for my charcuterie board, I think about more than just which flavors will go well together. I also consider the colors and textures. For example, if I’m adding blackberries, I probably won’t also add blueberries and purple grapes because the colors are so similar. Instead, I like to choose a variety of colors, shapes and textures to create contrast and make the board more visually interesting. Think of your fruit as part of the decoration too. It should taste good, but it should also help make the whole board look beautiful.
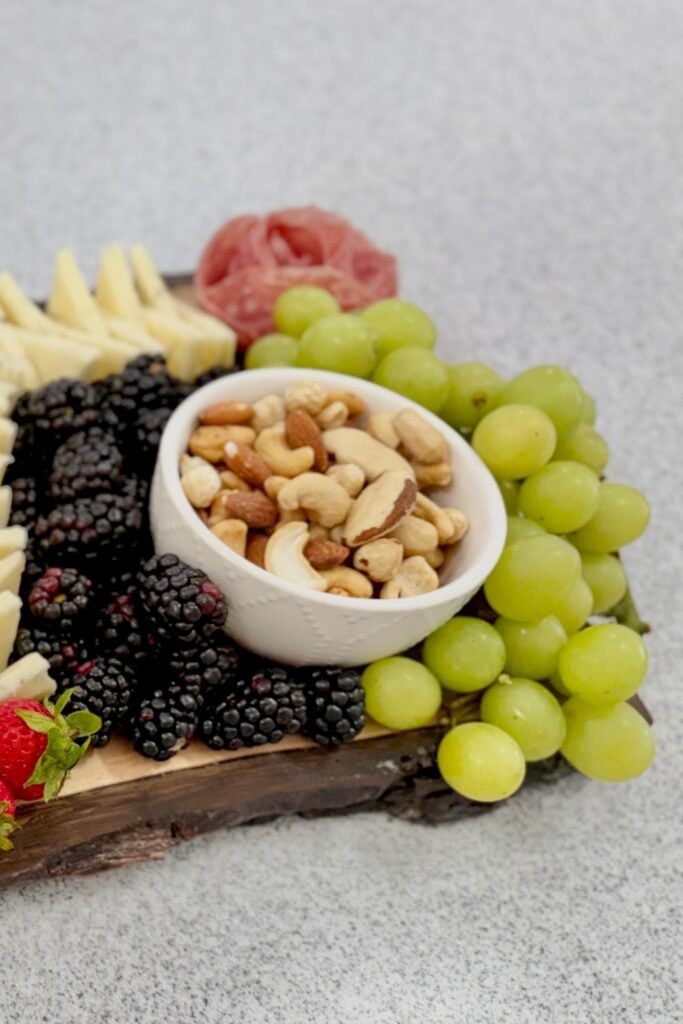
Grapes are one of my favorite fruits for a charcuterie board. Leave them in little bunches and tuck them into empty spaces. They add a little height, and I especially love how they can hang over the edge of a live edge board.
Blackberries are my other fave. They pair especially well with creamy cheeses like Brie, but honestly, they’re pretty delicious with just about any cheese. Their sweet, slightly tart flavor is a perfect little bite alongside salty meats and cheese, and I love the pop of dark color they add to the board.
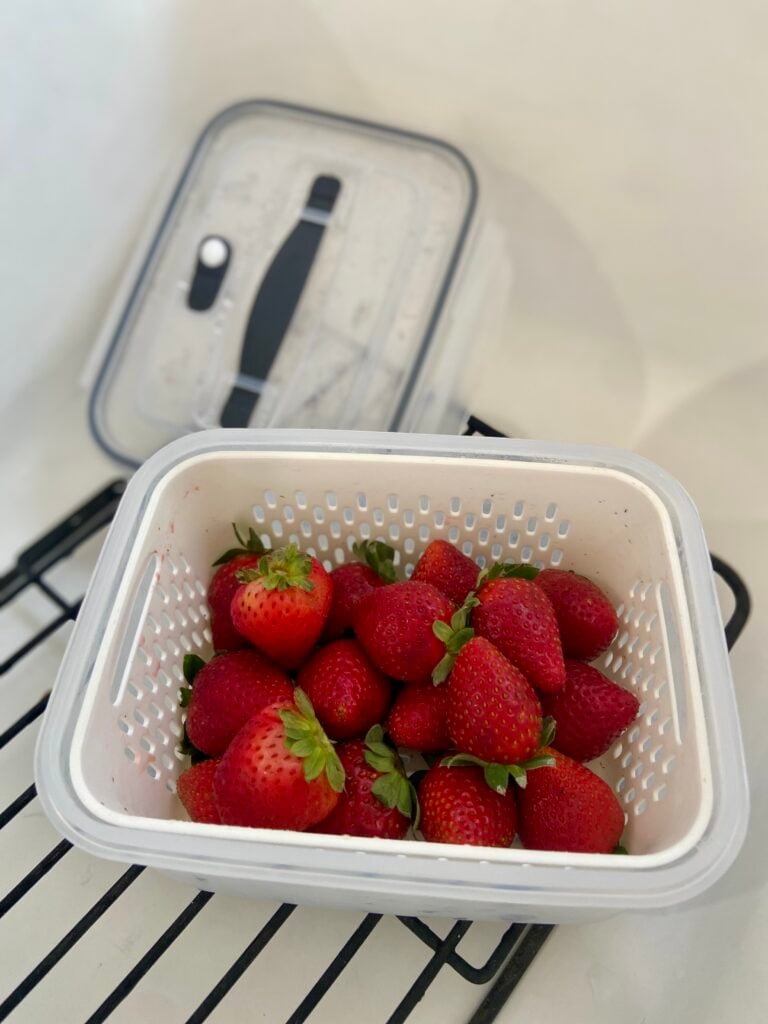
Truly, there’s no wrong fruit to put on your board! Just be careful with really juicy fruits, like watermelon and pineapple, since their juices can wander onto the other foods. Other than that, the combinations are pretty much endless, so choose your favorites and have fun with it!
Fresh or Pickled Veggies
While fruit, meat and cheese can cover a board, fresh or pickled vegetables are a great option as well. Some great options would be:
- Mini bell peppers
- Mini cucumbers
- Dill Pickles
- Cherry or grape tomatoes
- Carrots
- Snap Peas
- Olives
Don’t Forget the Extras
Once you have your meat, cheese and fruit/veggies, you can add a few little extra accompaniments to fill things in. Some ideas include:
- Jam
- Fig preserves
- Honey
- Hot honey
- Mustard
- Almonds
- Pecans
- Walnuts
- Pistachios
- Crackers
- Bread
- Dried fruit
- Dark chocolate
You don’t need all of these. Pick a few that go well with the meats and cheeses you’re serving. I especially love adding something sweet, like fig jam or honey, along with something crunchy, like nuts. That gives people lots of different combinations to try. Use ramekins or small bowls for things like nuts, dried fruit, jams and olives.
How to Arrange a Charcuterie Board
Here’s the secret to making a charcuterie board look beautiful: Start with the larger items and work your way down to the smaller ones.
Step 1: Start with the big items
I like to place the largests items on the board first. On my board, my brie wheel and ramekin with mixed nuts were the two biggest items on the board. I placed them on opposite sides and corners of the board for balance and arranged them how I wanted them.
Step 2: Add the rest of your cheeses
Since the Brie was one of the biggest items on my board, I added my other cheeses next, making sure they were spread out rather than grouped together. I used Brie, Havarti and some Sopressata pinwheels. When arranging everything, I like using curved lines and rounded edges instead of straight, rigid lines. It helps the different foods flow together and gives the board a more natural, relaxed look.
Step 3: Add your meats
Now it’s time to make the meat look pretty! I made my salami roses and tucked them into different sections of the board to spread out the color and shape. Then I folded my prosciutto and nestled it between my two main cheeses. It’s starting to look like a real charcuterie board now!
Step 4: Add the fruit
Now start filling in the spaces around the meat and cheese with fruit. This is where grapes, berries and other small fruits work really well.
I like to group similar fruits together rather than spreading one grape here and one blueberry there. Think little clusters. Tuck fruit into any larger empty spaces.
Step 5: Fill in the gaps
Now it’s time for the finishing touches. Look around your board for those little empty spaces and fill them in with nuts, crackers, dried fruit, jam, olives, fresh herbs or whatever other extras you’re using. Crackers can be a great way to fill in larger spaces, and plenty of people arrange them right on the board. I prefer to serve mine on the side, but there’s really no wrong way to do it.
And don’t worry about making everything perfectly neat. A little variety is what makes a charcuterie board look inviting. Let some things be neatly stacked while others are loosely arranged or tucked into little spaces. You’re going for full and abundant, not perfectly organized!
A Few Simple Charcuterie Board Tips
Use different shapes
A board with everything cut into cubes can look a little boring. Mix things up with triangles, rectangles, circles, folded meats, salami roses and little clusters of fruit.
Use different colors
This is one of the easiest ways to make your board look beautiful. Think about the colors you’re putting together. Green grapes, red strawberries, dark berries, pale Brie and golden cheese naturally create lots of contrast.
Don’t make everything perfect
This might be the best tip of all. Your charcuterie board does not need to look like it belongs in a magazine.
Let the prosciutto be a little ruffly. Let the grapes spill over a little. Tuck things into the spaces instead of worrying about making everything line up perfectly. A little organized chaos is part of the charm.
Cut things ahead of time
If you’re serving your board at a party, do as much prep as you can before your guests arrive. Cut the cheese, wash the fruit, fold the meat and arrange anything you can ahead of time. That way, when everyone arrives, you can put the board out and actually enjoy your own party instead of standing in the kitchen cutting cheese while everyone else is eating it.
No board, No problem
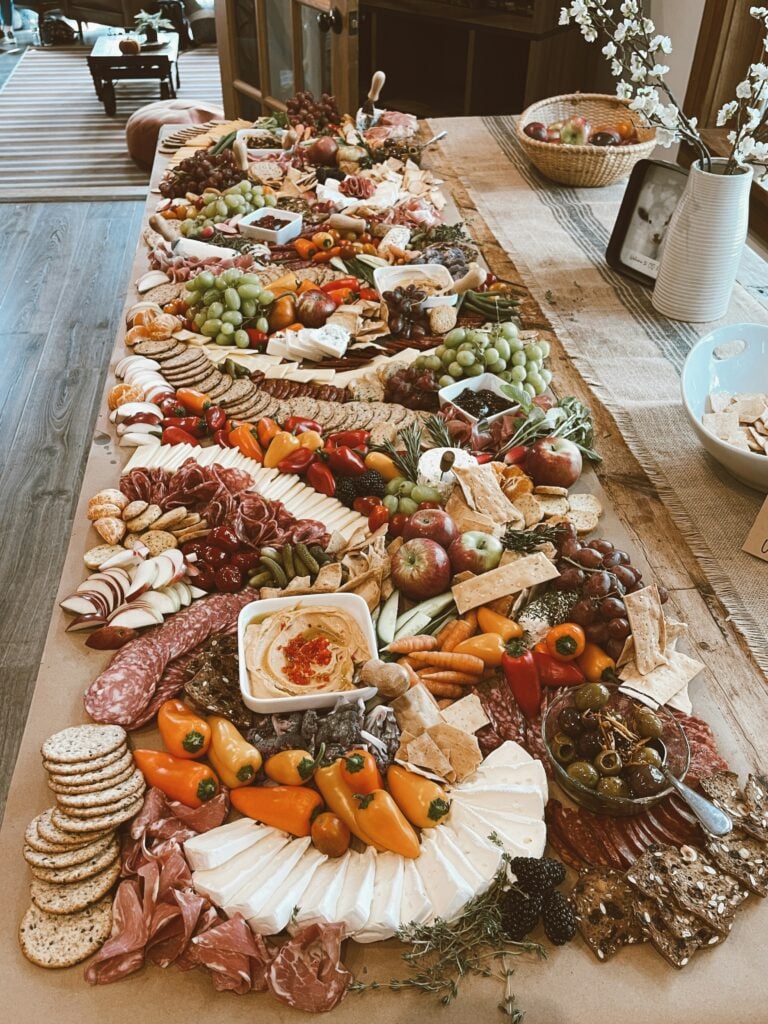
Want to make a really large charcuterie board but don’t have a board big enough? No problem! Just lay a long piece of butcher paper on your counter or table and build your charcuterie board right on top of it. It’s an easy and inexpensive way to make a board as big as you need without having to buy a giant serving board.
How Much Food Do You Need?
Figuring out how much food to buy for a charcuterie board can be tricky. You don’t want to run out, but you also don’t want to end up with enough leftover cheese to feed the neighborhood.
A good rule of thumb is to plan for about 1 to 2 ounces of cheese and 1 to 2 ounces of meat per person if your board is an appetizer. Add about 2 ounces of fruit, nuts and other extras, around 1 ounce of dips or spreads, and 6 to 8 crackers per person.
If your charcuterie board is going to be the main meal, plan on a little more. Aim for 2 to 4 ounces each of cheese and meat, about 4 ounces of fruit, nuts and other extras, around 2 ounces of dips or spreads, and about 12 crackers per person.
Of course, these are just starting points. If you’re serving a crowd of big snackers, you may want to add a little extra. And if you have lots of other food being served, you can scale back. Just multiply the amounts by the number of people you’re feeding and you’ll have a pretty good idea of how much to buy.
Trader Joes and Aldi are great places to find a good selection of affordable charcuterie items. You don’t have to spend a fortune to put together a beautiful board!
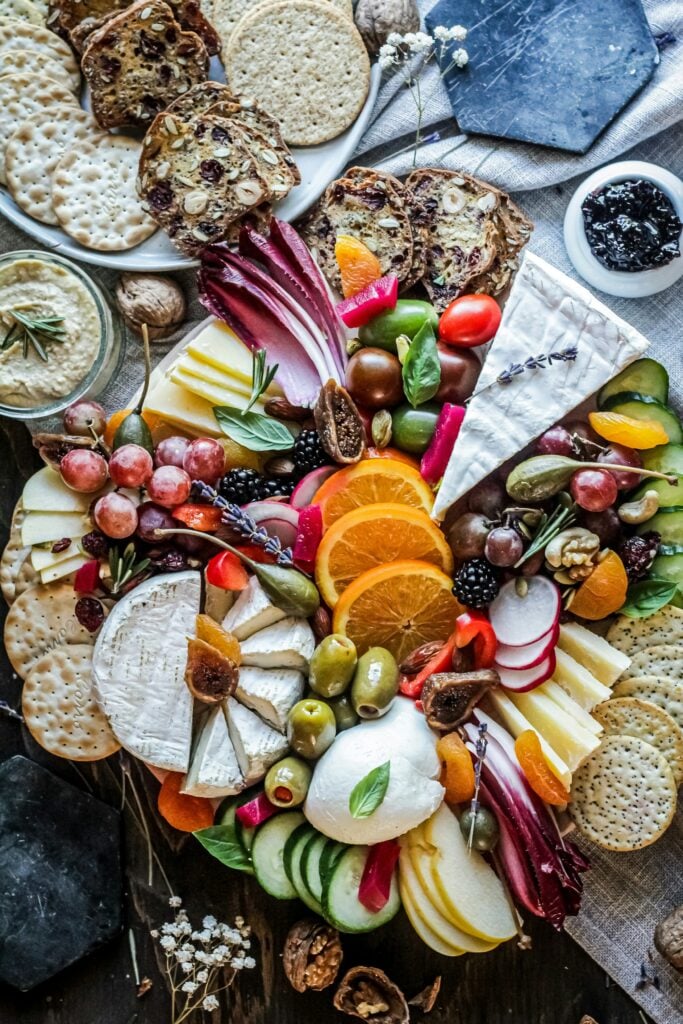
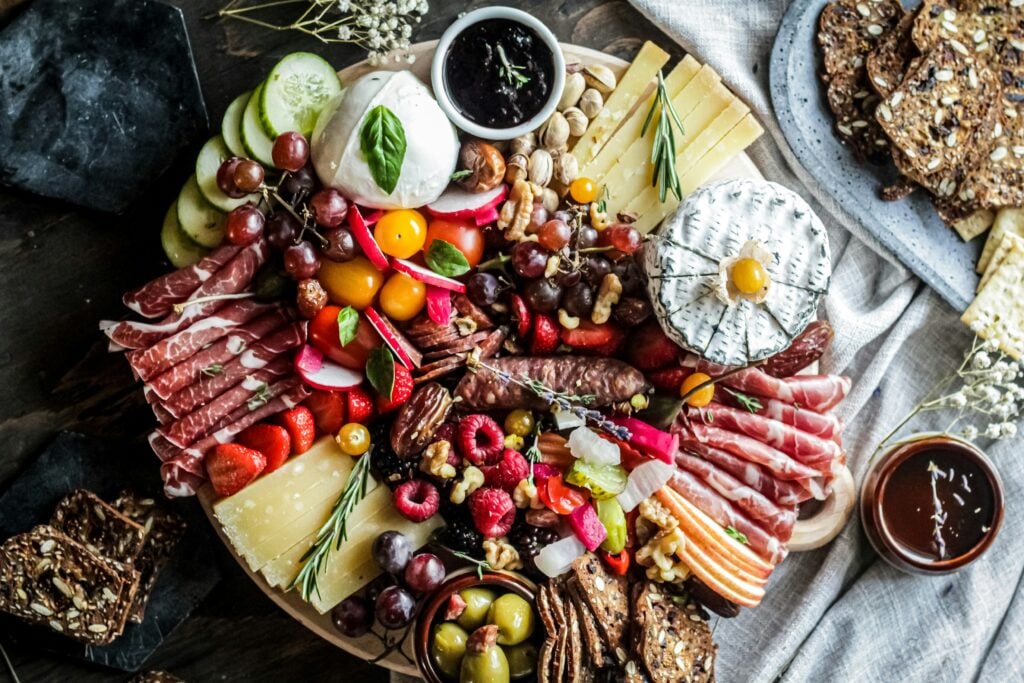
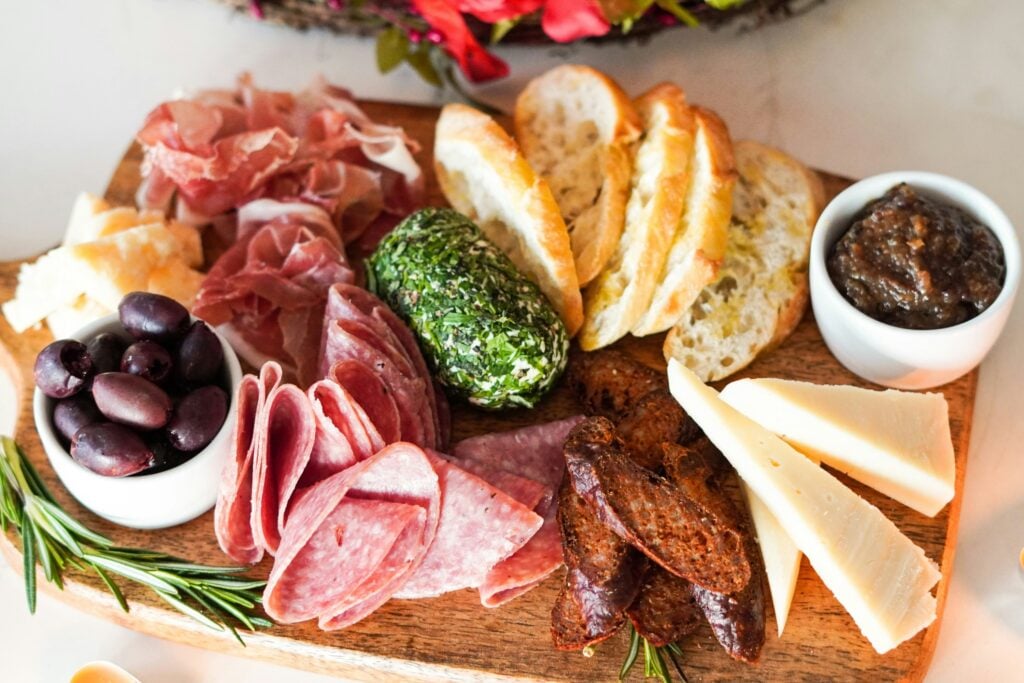
Inspiration Photos
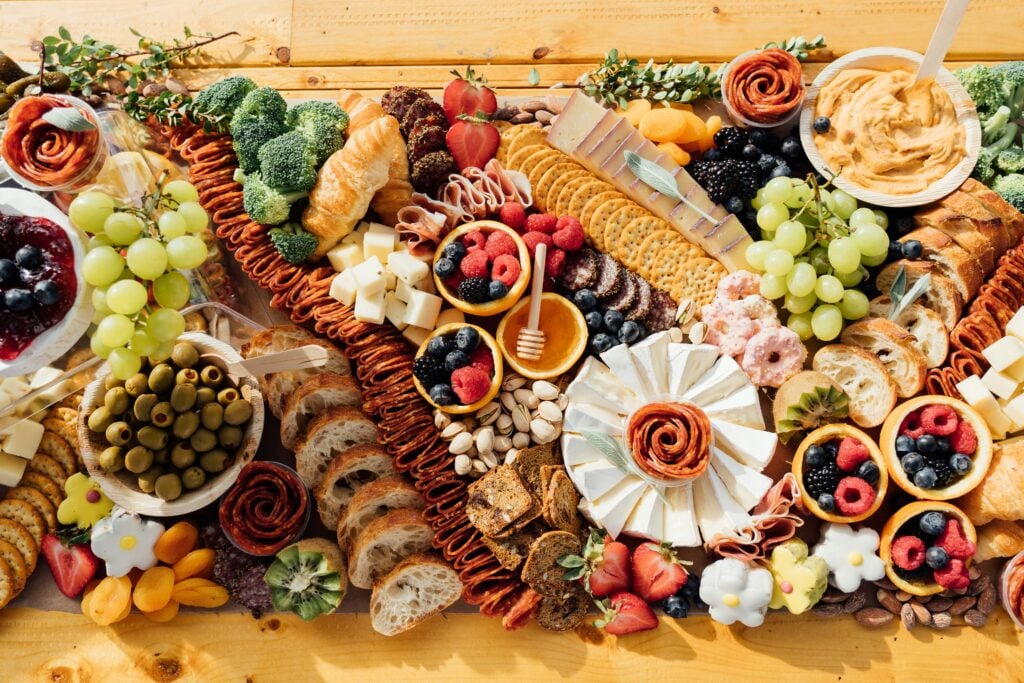
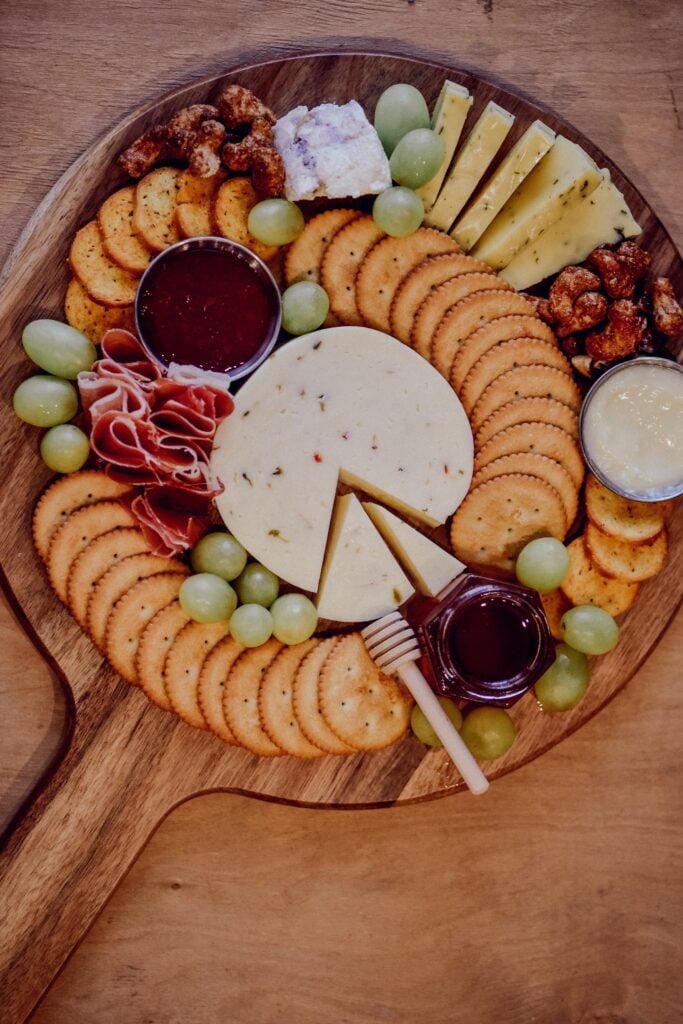
There really are no hard and fast rules when it comes to charcuterie boards, and no two boards will ever look exactly alike. Use these inspiration photos as a starting point, then have fun creating a board that’s all your own!
Elevate Your Charcuterie with these Tools
You probably already have everything you need to make a basic charcuterie board, but if you love hosting and want to take your charcuterie game up a notch, a few simple tools can make arranging and serving your board even easier.

Have Fun With It!
The best thing about making a charcuterie board is that there really isn’t one right way to do it. Start with the things you know your family and guests will enjoy. Add a few different textures and flavors. Then arrange everything in a way that looks pretty to you.
And if all else fails, put a salami rose in the middle. People will think you’re fancy. You don’t have to tell them how easy it was to make.
If you’re looking for more delicious appetizers to serve to your guests, try the Pepperoni Cheese Bread, Teriyaki Chicken Wings or the Slow Cooker Meatballs.