{Stork Report Guest Blogger} Diaper Cake Tutorial
This post may contain affiliate links for your convenience. Read my full disclosure policy here.
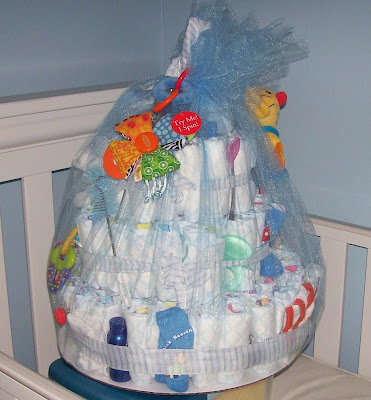
Tired of the same old baby shower gift? Have you searched the stores over and over for something unique and different? Do you wish you could create something that was both thoughtful and useful for the mom to-be? Perhaps a diaper cake is your answer. This tutorial will guide you through how to make a fun and easy present that is sure to please any expectant mom! (and leave all the other guests wishing that they thought of it…)
The first thing you’ll need to do is gather all of your supplies:
- 1 cardboard cake round (I always go over to my local pizza shop and ask for one)
- 2 yards inexpensive tulle in your choice of color
- diapers! you’ll need 3 packs for 3 tiers, one of each size 1, 2, 3.
- curling ribbon to tie diapers, cut into 12 inch pieces.
- a thick ribbon to wrap around each diaper layer.
- a cute baby bottle to sit on top -a tall one works best!
- small toys, teethers, washcloths, feeding spoons, pacifiers, and anything else to adorn the completed cake. -hit up the dollar store and go crazy in the baby aisle!
Ok, now for the step-by-step guide to building a fabulous and unique baby gift that every new mother will appreciate:
1. Roll each diaper into itself nice and tight- tie with curling ribbon, then trim ends. Be sure to keep the sizes separate from each other, as you will make one layer of each size. (this makes it easy on the mom, because she can unwrap the cake one layer at a time as her baby grows!)
2. Arrange the rolled size 1 diapers standing on edge in a circular shape. You’ll need an extra set of hands to hold the diapers tightly together while you secure with the wide ribbon. Make sure it’s nice and tight so no diapers can slip out. Also, be sure to put the baby bottle in the middle.
3. Repeat for the size 2s, and then the size 3s. At this point you should have your three tiers of the diaper cake.
4. Place the largest layer on the cardboard cake round, and stack the other layers on top.
5. Tuck fun surprises into the ribbon all over the cake. -I always try and fill up my cake with useful and colorful things for baby… a couple of bright colored teethers or rattles, pacifiers, feeding spoons, etc.
6. Lay out your tulle and place the assembled cake in the middle. Pull up the corners of the tulle, then the sides, and tie it tightly with a ribbon. (you could use a rubber band, then a ribbon over it if you have trouble keeping it tight while trying to tie it.)
7. Trim the top of the tulle, leaving 2-3 inches of gathering above the ribbon.
That’s it. This makes a wonderful focal point at a baby shower, or just a creative gift for a new mom or mom to-be. You can really make it as elaborate or simple as you like. Also, you can adjust the amount of diapers and/or accessories to fit your budget. A mini diaper cake with 2 tiers still makes a great homemade, thoughtful gift!
Mary Ellen visits us from her blog, Thou Shall Not Whine. She is a busy blogging stay-at-home-mom with three little ones. She blogs because it helps her remember to laugh -even at the things that don’t seem funny. Her blog also features occasional reviews and giveaways of products she loves.
Thanks so much, Mary Ellen! Now I have no excuse not to make one of these lovely cakes for the next shower I host. You really made it sound so easy. I hope you’ll stop over and check out her wonderful blog. Mary Ellen will be back in a few weeks with a homemade biter biscuit recipe, too. Can’t wait for that, since I’ll soon be entering the biter biscuit world again!
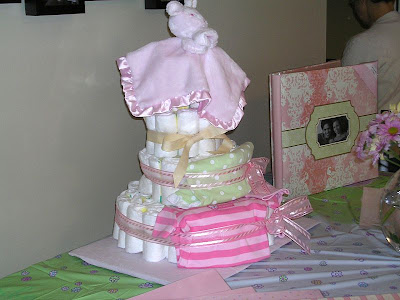
Just for fun, here are a few diaper cakes from my shower and the shower we hosted for my sister. We had TWO diaper cakes at her shower; both were unique and made beautiful centerpieces!
Stay tuned for many more guest bloggers this month! And don’t forget about our great giveaways, currently SEVEN total (with tons more to come…)
Mini-quilt by Sewing Maniac
$35 gift certificate to Garden of Holly
$50 gift card to Safeway stores
