How to Organize Recipes (Free Printable Recipe Binder Covers)
This post may contain affiliate links for your convenience. Read my full disclosure policy here.

One lament I hear all the time when it comes to decluttering is just how difficult it is to discard books. As a former librarian and book lover, I totally get it. After I shared about how to declutter books the KonMari way, the emails started flooding in begging for help in one particular area– RECIPES. Since recipes crosses both the book (cookbook) category as well as the paper category, I thought it would be a good one to tackle today (particularly with the holiday cooking and baking season coming!) Plus, it’s been awhile since we shared a free printable and I hate to leave you hanging so I created three choices of recipe binder covers for you to choose from (keep scrolling for the link to download them.)
Now let’s dive into the decluttering! As mentioned previously, I kept only a few much-loved cookbooks. Most recipes can be found digitally nowadays so I mostly organize mine on Pinterest. Since I have so many, I have five Pinterest boards which hold all my online recipes– making them easy to find. Here are links to those boards for an idea of what’s in each:
Of course, not all recipes are on Pinterest. Those that are pulled out of magazines, handwritten by grandmothers, or photocopied from cookbooks are still precious and useful. Mine were shoved into a shoebox, ensuring that not only would I not use them, but it was impossible to put my hands on anything quickly. So, it was time to organize them and it only took about two hours. It’s a project I wish I’d tackled much sooner!
TIP: If you only like a few recipes from a particular cookbook, photocopy them and let go of that cookbook. Why waste the space when you only want a couple of recipes? You can also scan and upload to Pinterest to really go paperless if you wish.

Here’s the basic supplies:
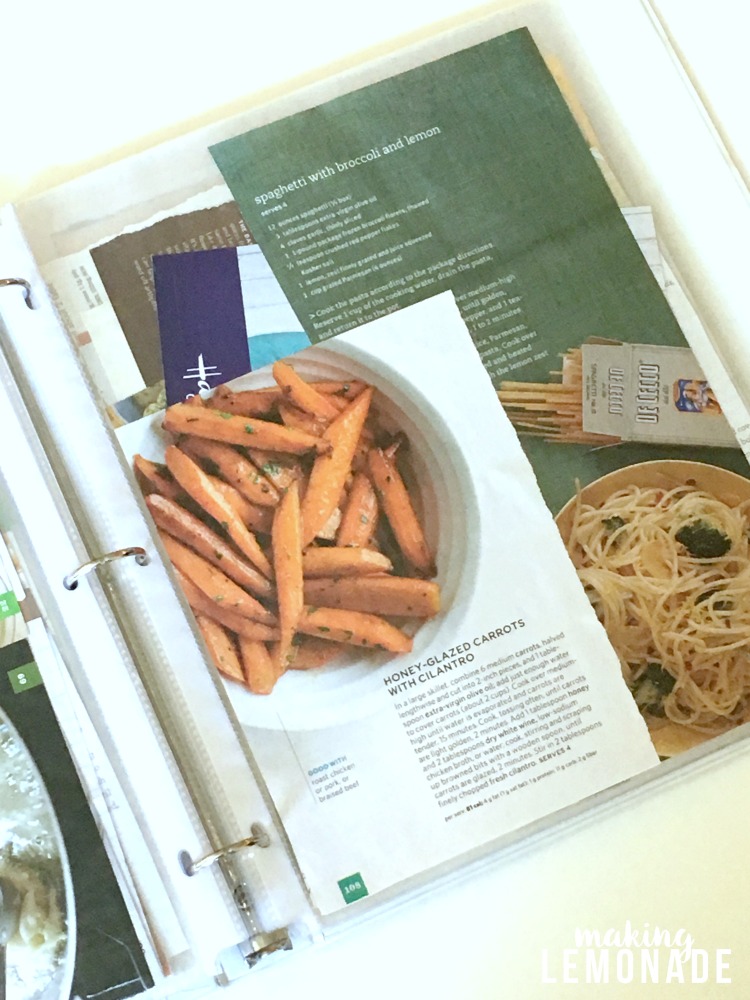
3-ring binder with clear cover (I used a one inch but depending on how many recipes you have you may need a 2 inch)
index dividers (you may need two sets)
label maker (optional, but I love how neat it makes the labels look)
free printable recipe binder covers (see below)
Step One: Gather all your paper recipes. Photocopy favorites from your cookbooks, then discard the cookbook. Go through and decide which ones you will actually make and toss the rest. My preferences have changed drastically in the past few years so I ended up discarding a lot!
Step Two: Sort recipes by category. Here’s the categories I found most helpful, and I used my label maker to create a tag for each:
- Beverages
- Appetizers
- Soups, Salads, Sandwiches
- Side Dishes
- Main Dishes (can break this down further by category: meat, poultry, seafood, etc.)
- Breakfast
- Desserts
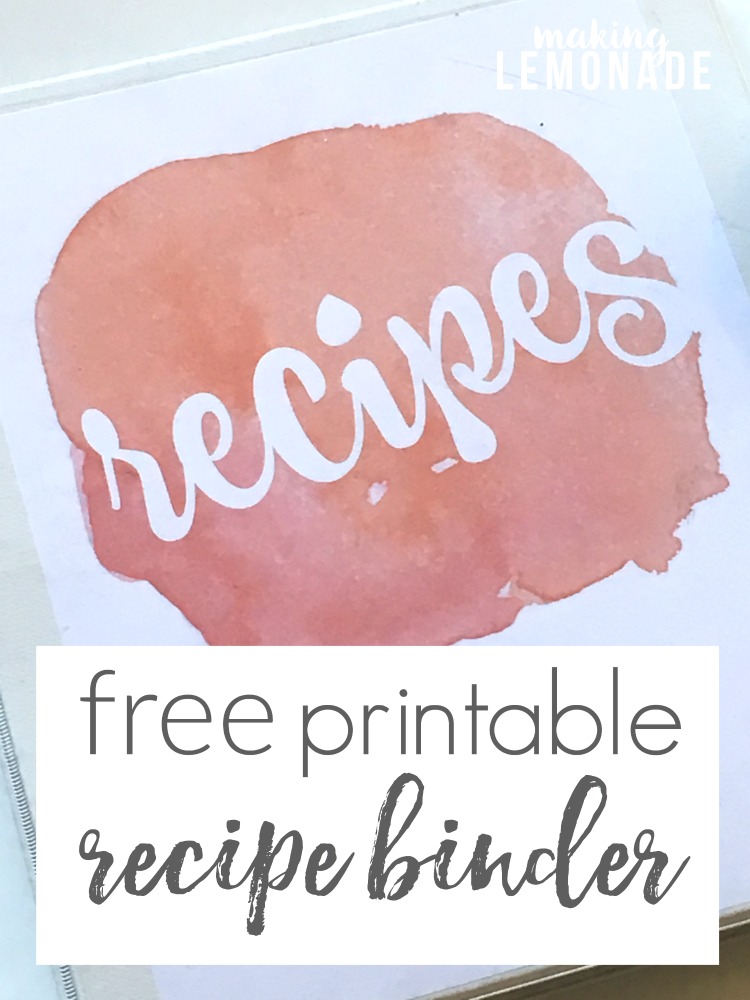
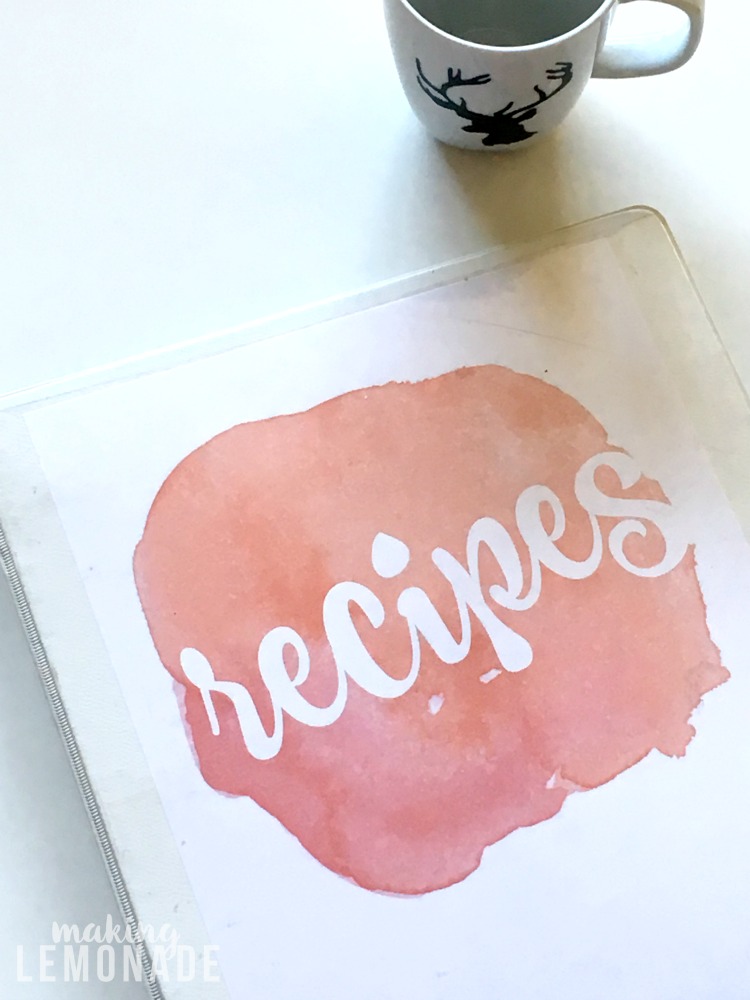
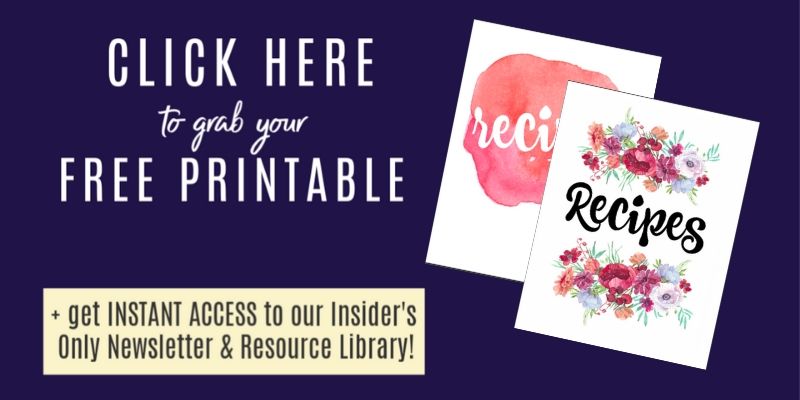
Step Three: Insert recipes into plastic protectors and place in binder by category. Use dividers labeled with each category to divide them. Print one of the free printable recipe binder covers and add to the front:
Click Here to Access the Free Recipe Covers
That’s it! After a few hours of work, you have now (hopefully) discarded most of your cookbooks and old recipes you’ll never make. Then you’ve organized the ones you DO love so you have them at your fingertips whenever needed.
You, my friend, are an organizing ROCKSTAR.
Start our KonMari Method Decluttering series from the beginning!
- How This Little Book will Change Your Life (Plus a KonMari Method Cheat Sheet)
- Free Printable KonMari Decluttering Checklist
- 10 Steps to Declutter Your Clothing Once and For All
- How to Organize Your Underwear Drawer
- How to Declutter Books and Magazines
- How to Organize Recipes (you are here)